ARMSX3 Emulator APK v1.0.6.1 Download (October 2026)

ArmSX3 is a PlayStation 3 (PS3) emulator for Android based on the RPCS3 source code, adapted for the arm64 architecture with various improvements and added features for ARM devices.
This emulator is still in the early stages of development, so there are some bugs in the application.
What Is ArmSX3?
ArmSX3 is a PlayStation 3 emulator for ARM devices based on the source code of the RPCS3 project. Essentially, it is a PS3 emulator ported to ARM devices, offering users of modern operating systems—such as Android—the possibility of playing PlayStation 3 games without purchasing the actual console. Features from RPCS3 have also been ported or added, allowing users to customize settings according to their device specifications.
This emulator was developed by the same core team behind the ARMSX2 emulator, alongside various contributors on GitHub. As an open-source project, it is poised to become a robust emulator capable of addressing user issues in the future. It also supports modern controllers via USB or Bluetooth connections, ensuring a high-quality control experience when playing PS3 games on the user's device.
ARMSX3 Main Features
Port of RPCS3
ARMSX3 is an Android port of RPCS3, the PlayStation 3 emulator. It tracks current upstream code, including the recent ARM64 work, rather than being a separate rewrite.
Built for ARM64 Android
Only arm64-v8a is supported. The JIT now detects the host CPU instead of targeting a 2016 in-order core, and SPU and RSX threads are placed on the fast cores of big.LITTLE designs.
Vulkan Rendering on Adreno
Upstream shaders required a Vulkan extension Adreno does not implement, so every pipeline failed to compile and nothing rendered. ARMSX3 emits concrete array bounds when that extension is missing.
Touch and Physical Controllers
Both on-screen touch controls and physical controllers are reported working, alongside rendering and audio.
Proof of Concept
Skate 3 boots, loads and reaches gameplay at roughly 20 to 30 fps on a Snapdragon 8 Gen 2. Almost nothing else has been tested, and speed is the main stop-gap right now.
Open Source
ArmSX3 is open source and developed in the open on GitHub, where you can read the code, follow progress and report bugs.
Supported Game Formats
Disc images
Standard .iso dumps of a disc you own. Put them in the folder you
pointed the app at and they appear in the library.
Folder dumps
A disc dumped as a directory, containing PS3_DISC.SFB and a
PS3_GAME folder. Boots straight from your ROM folder, which
matters for dumps that never existed as an .iso.
Packages (.pkg)
Games, updates and DLC install through the in-app installer. Split packages are supported — select every part at once and install them together. Installed titles are listed with an uninstall button.
Licences (.rap)
Some titles need a licence alongside the package: the
.pkg holds the content and the .rap unlocks it. Licence
files install one at a time.
ArmSX3 ships no games and no system software. You are expected to supply both from hardware and discs you own.
How to Install and Set Up ArmSX3
If you are new to using ArmSX3, follow these simple steps to correctly set up the emulator on your device. ArmSX3 requires PlayStation 3 system software and runs on arm64 Android.
1. Start the installation wizard
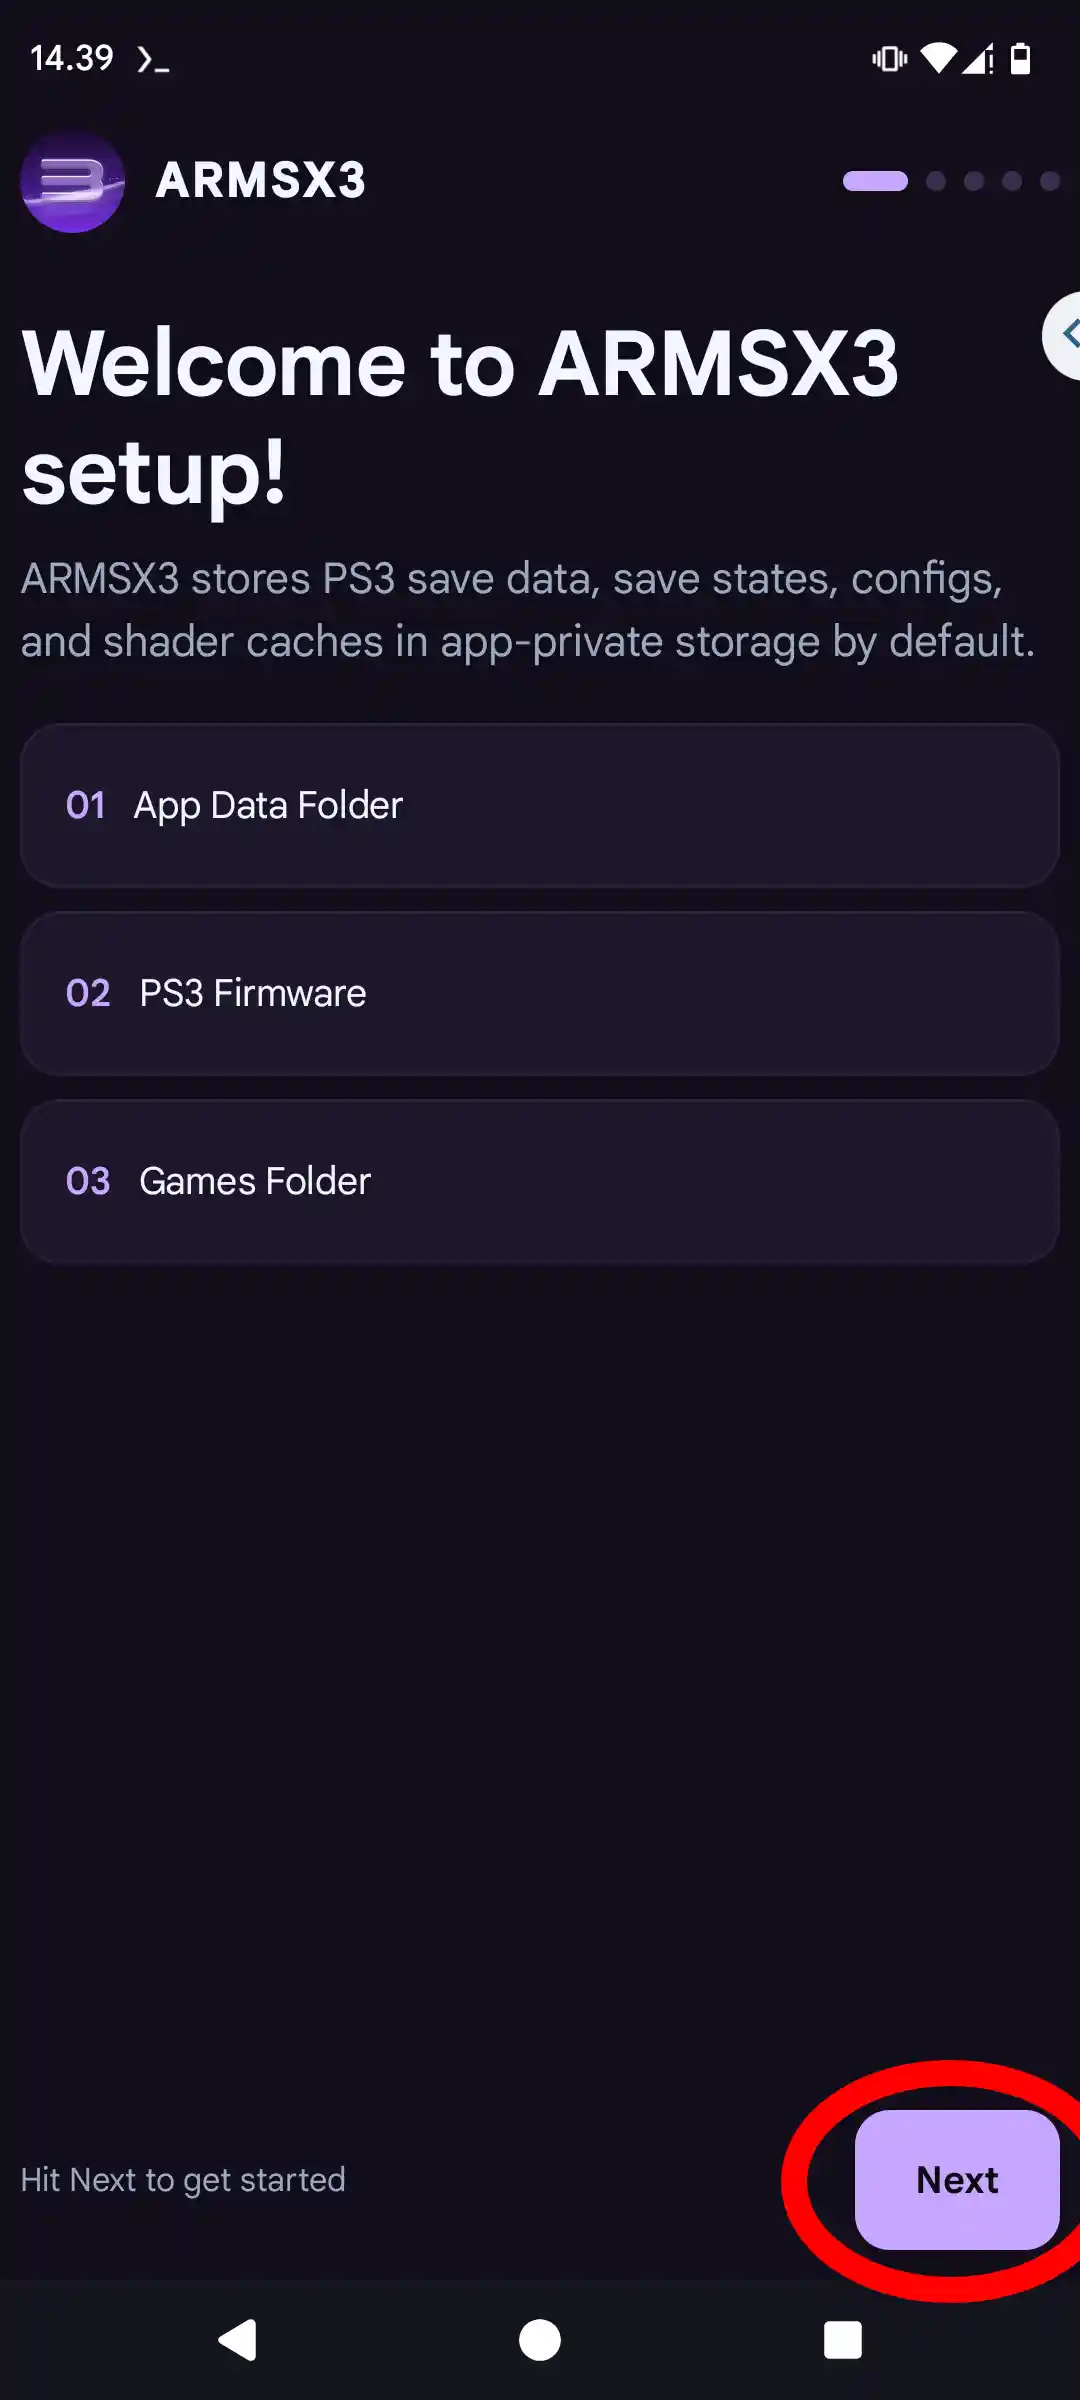
After installing the ArmSX3 application, open it and you will be presented with the first welcome page. This wizard will walk you through the initial setup. Just press Next.
2. App Data Folder
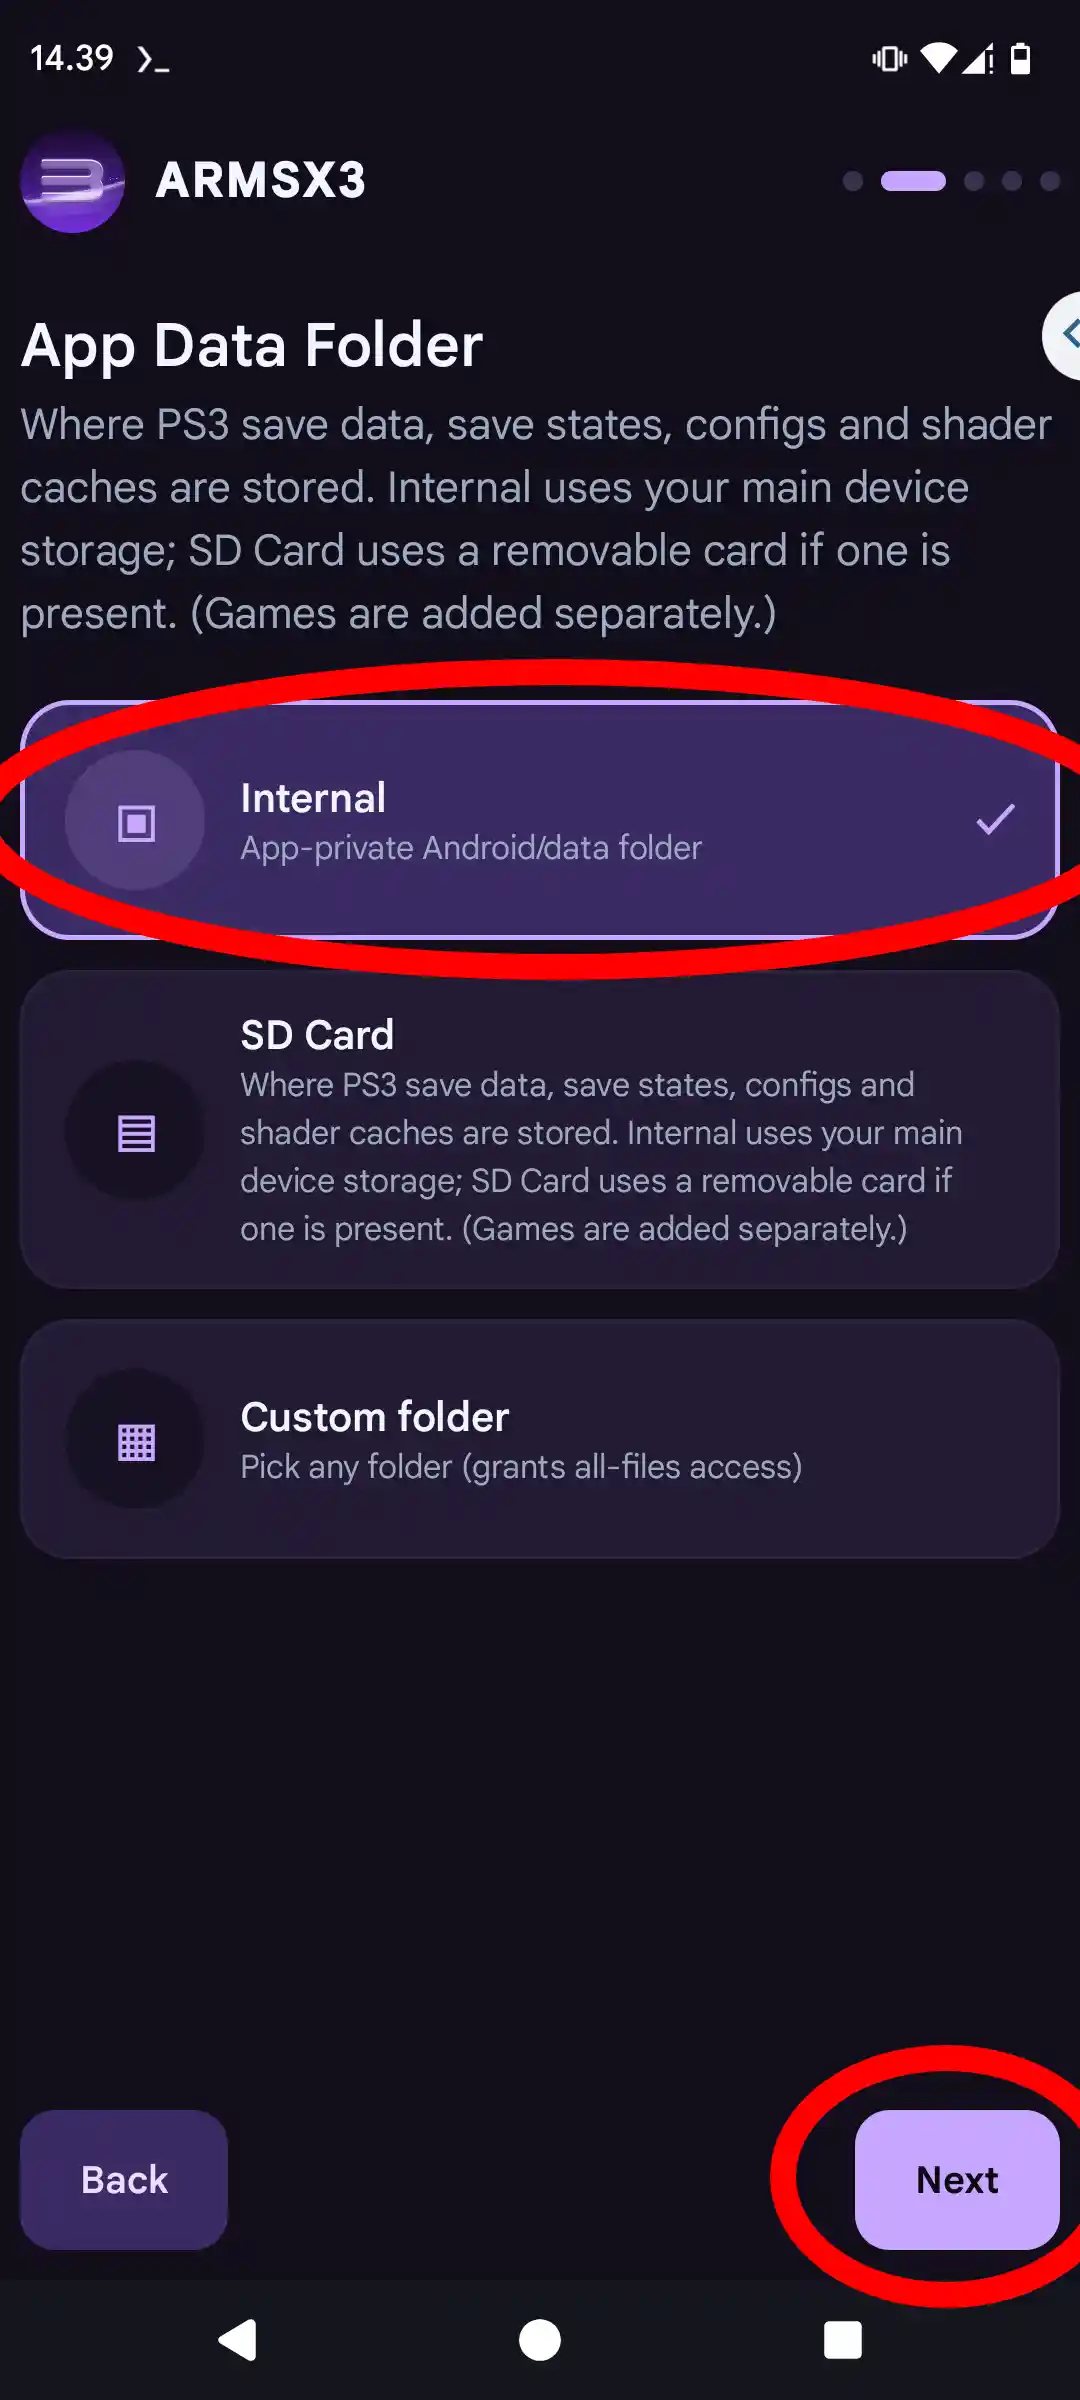
Select a location for ArmSX3 to store PS3 save data, states, and caches. We recommend selecting Internal, then tap Next.
3. Install PS3 Firmware
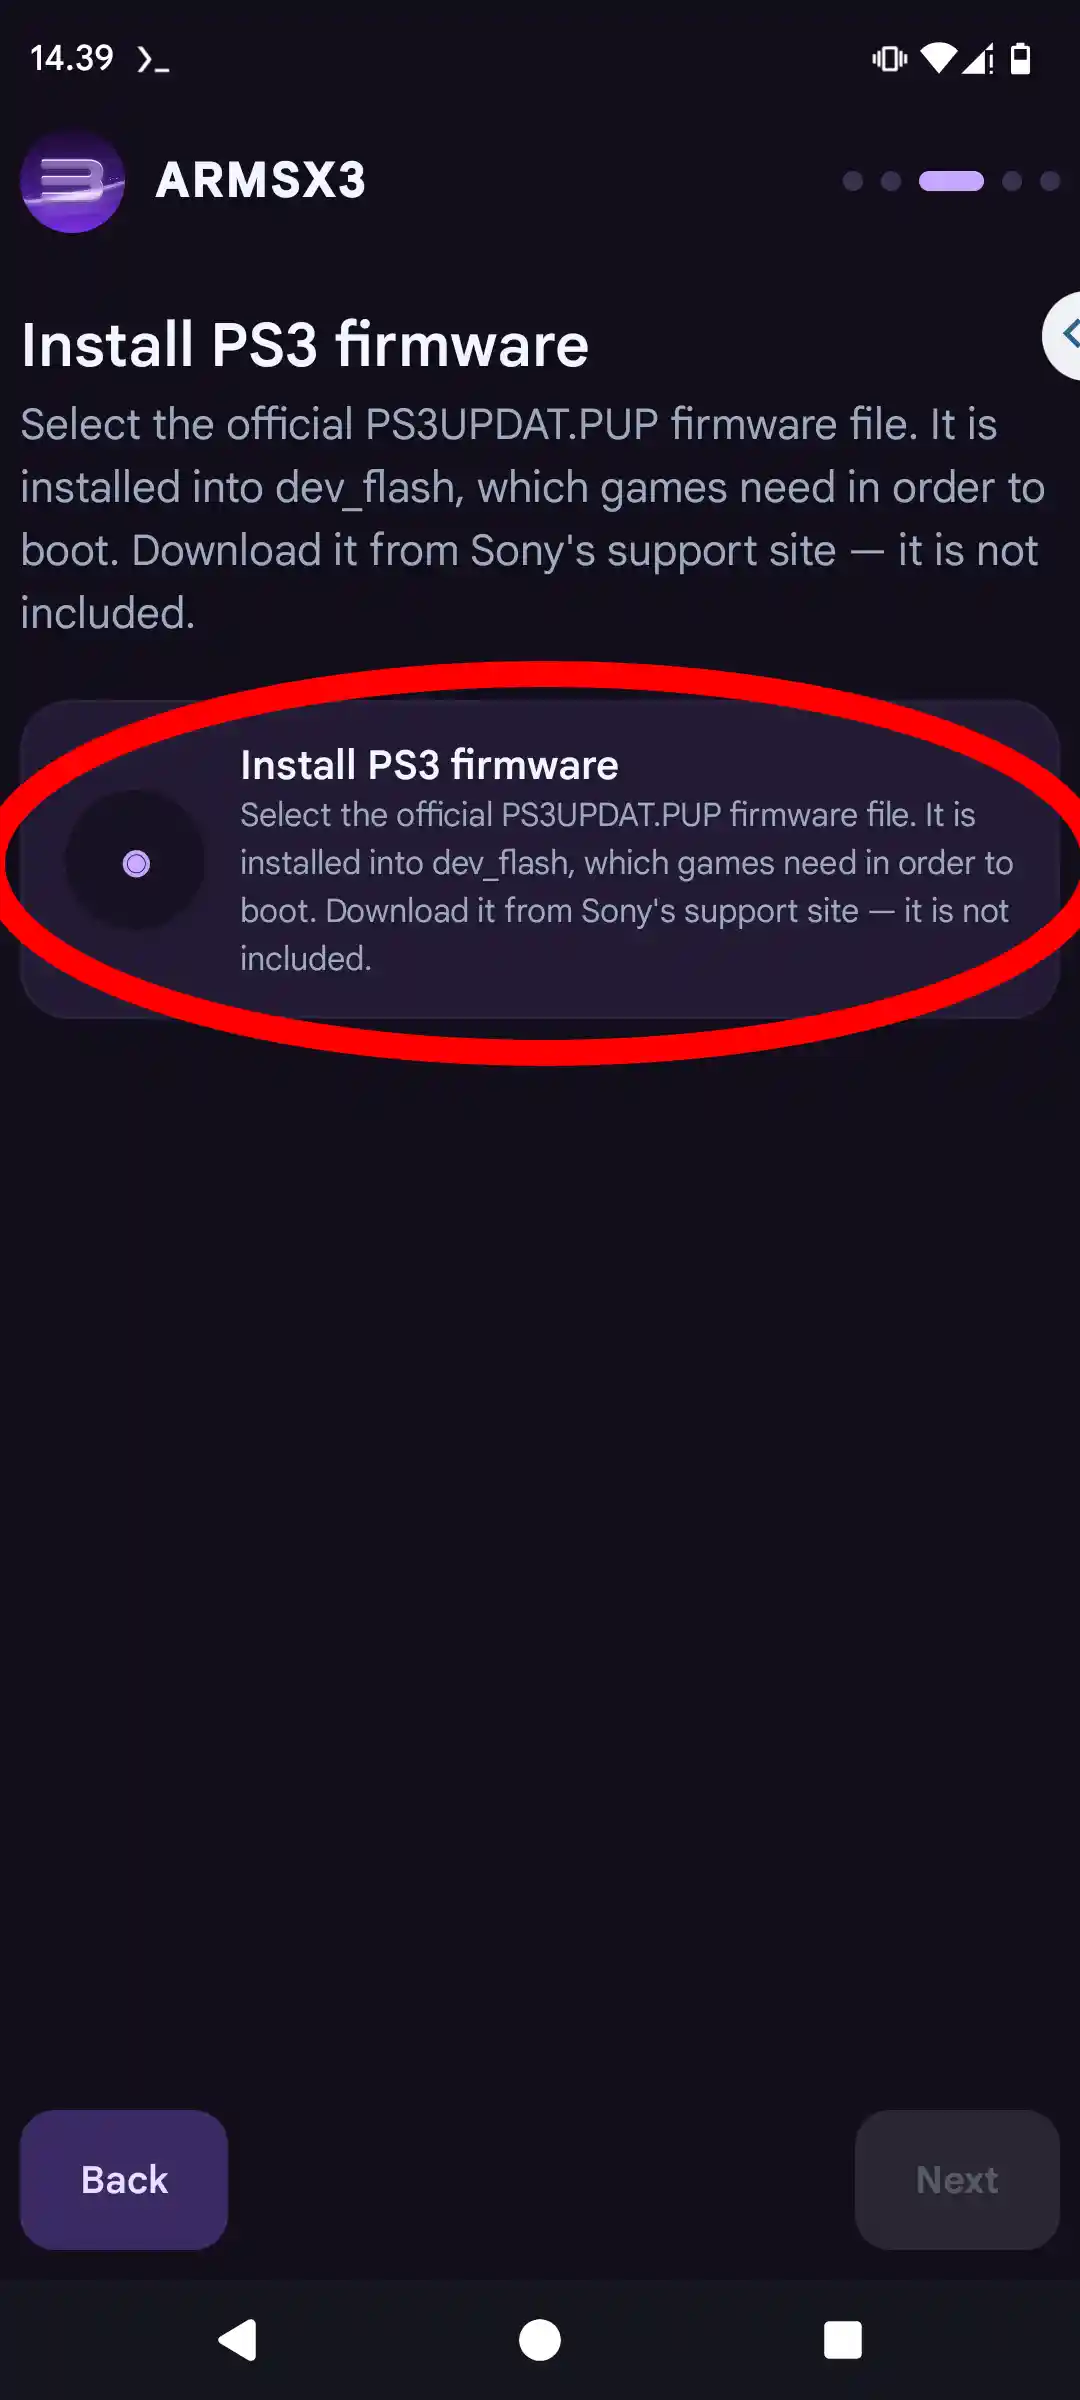
ArmSX3 needs the official PlayStation 3 system software to run games. This is not a PS2 BIOS. Tap Install PS3 firmware to locate the PS3UPDAT.PUP file you have downloaded from Sony's site.
4. Locate Your Firmware File
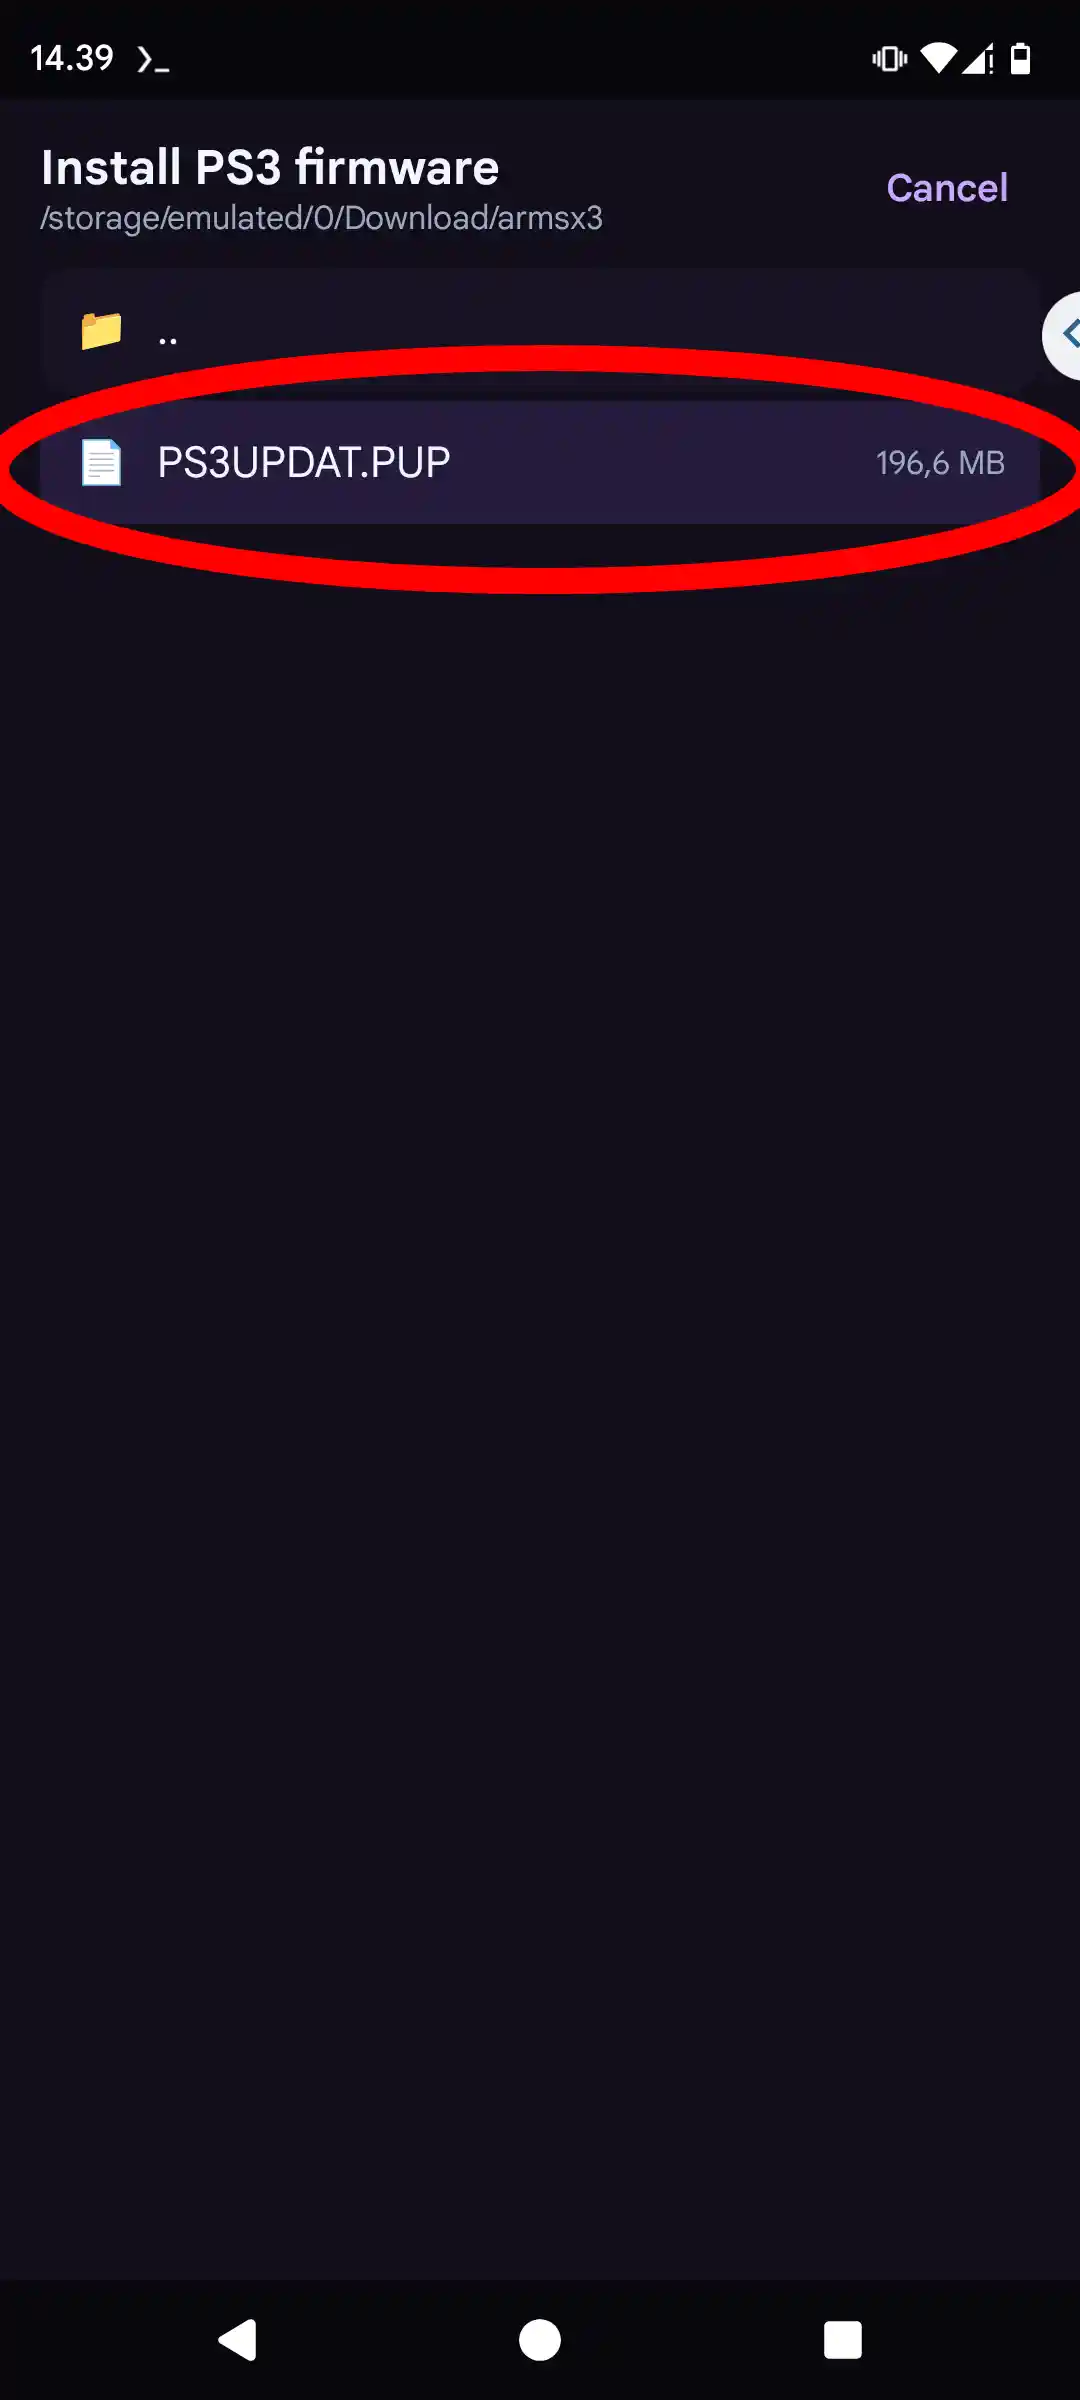
Navigate to the folder where you saved the PS3UPDAT.PUP file and select it.
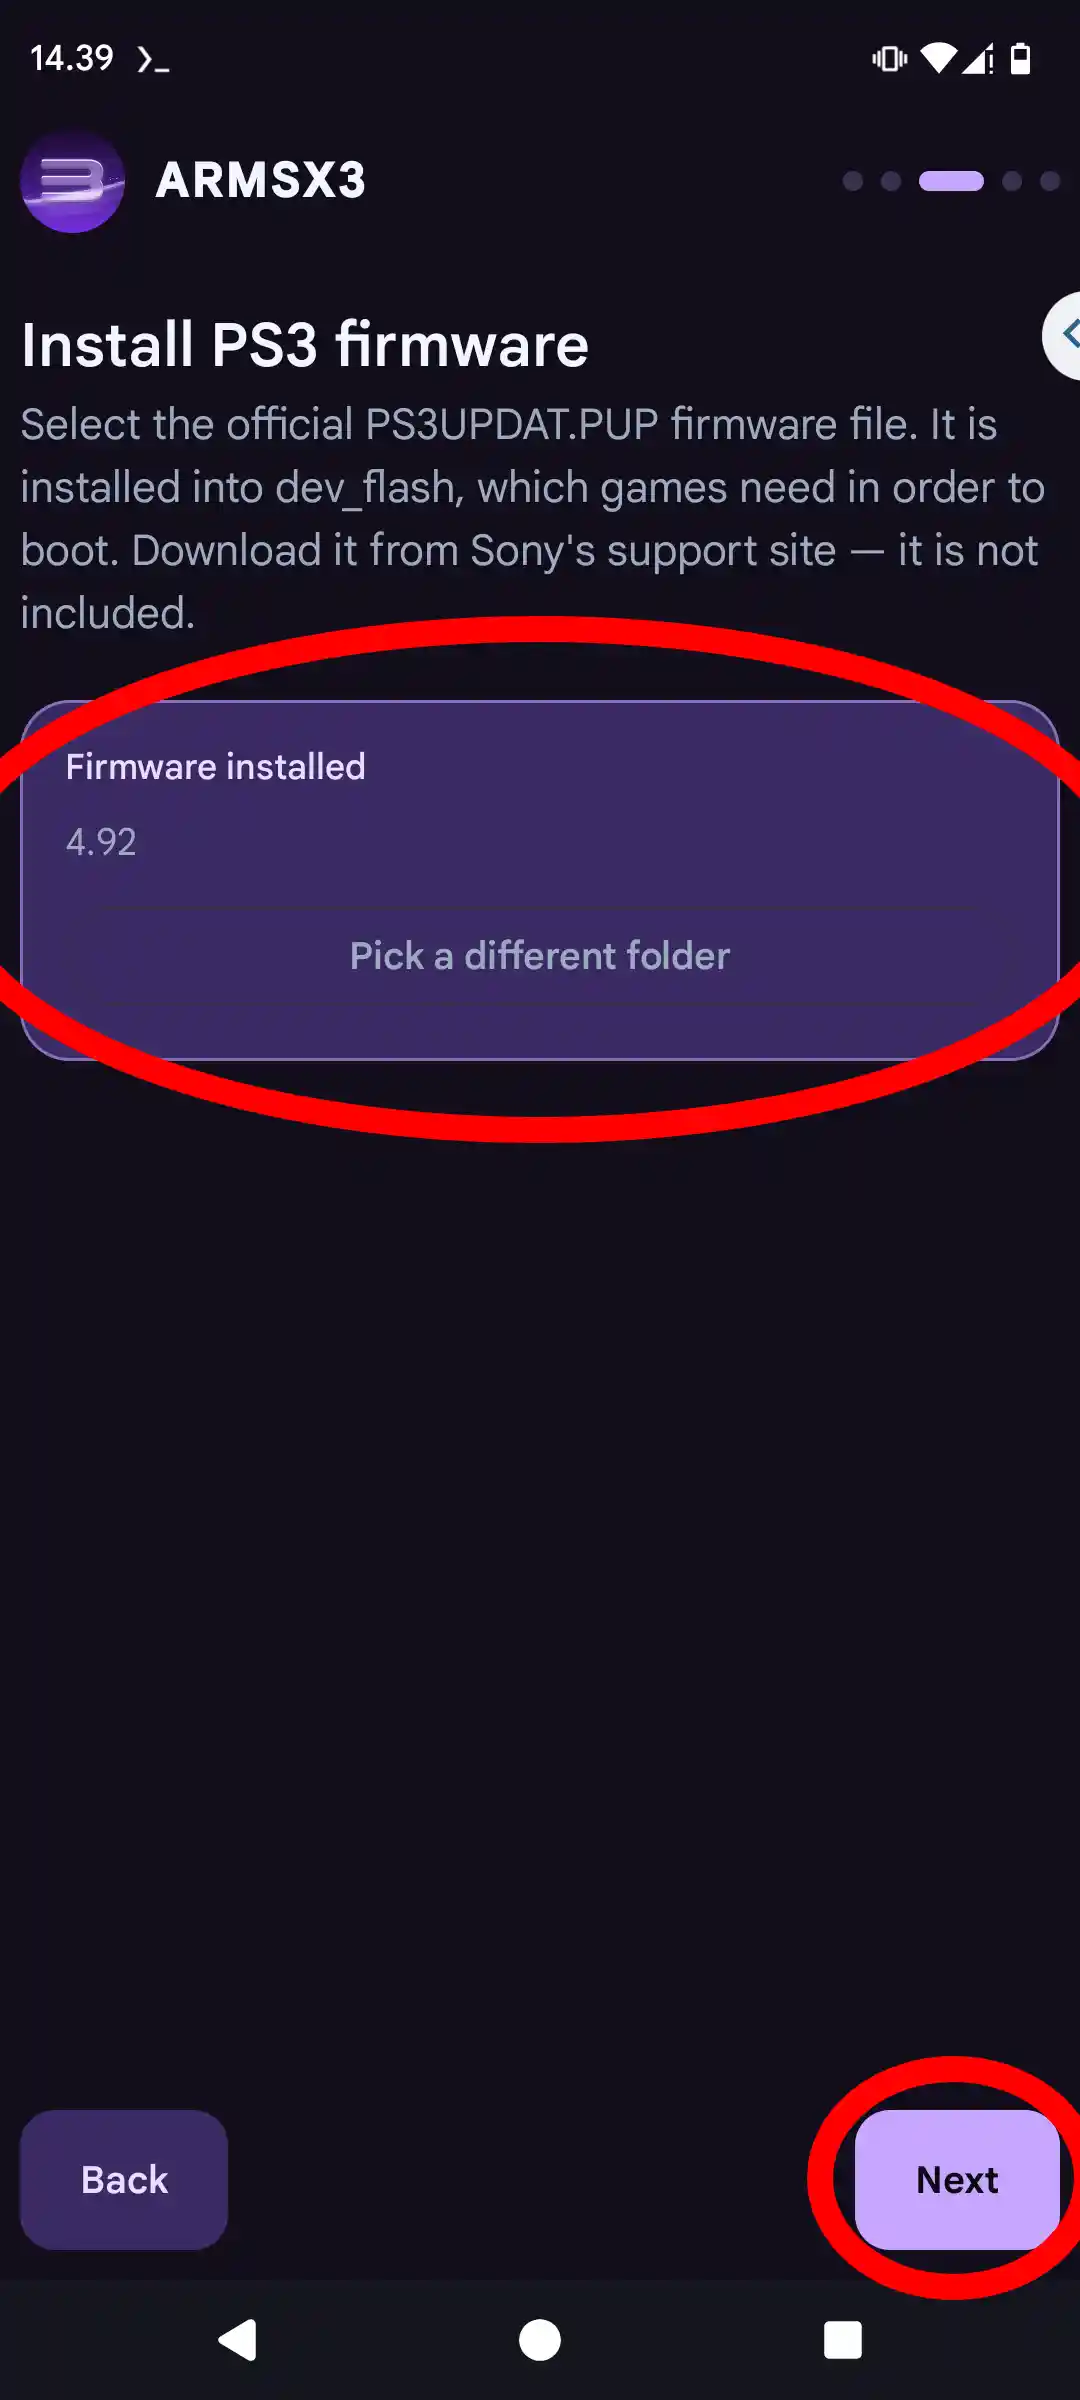
5. Confirm Firmware Installation
Once the firmware is successfully installed, you will see a "Firmware installed" confirmation. Tap Next to proceed.
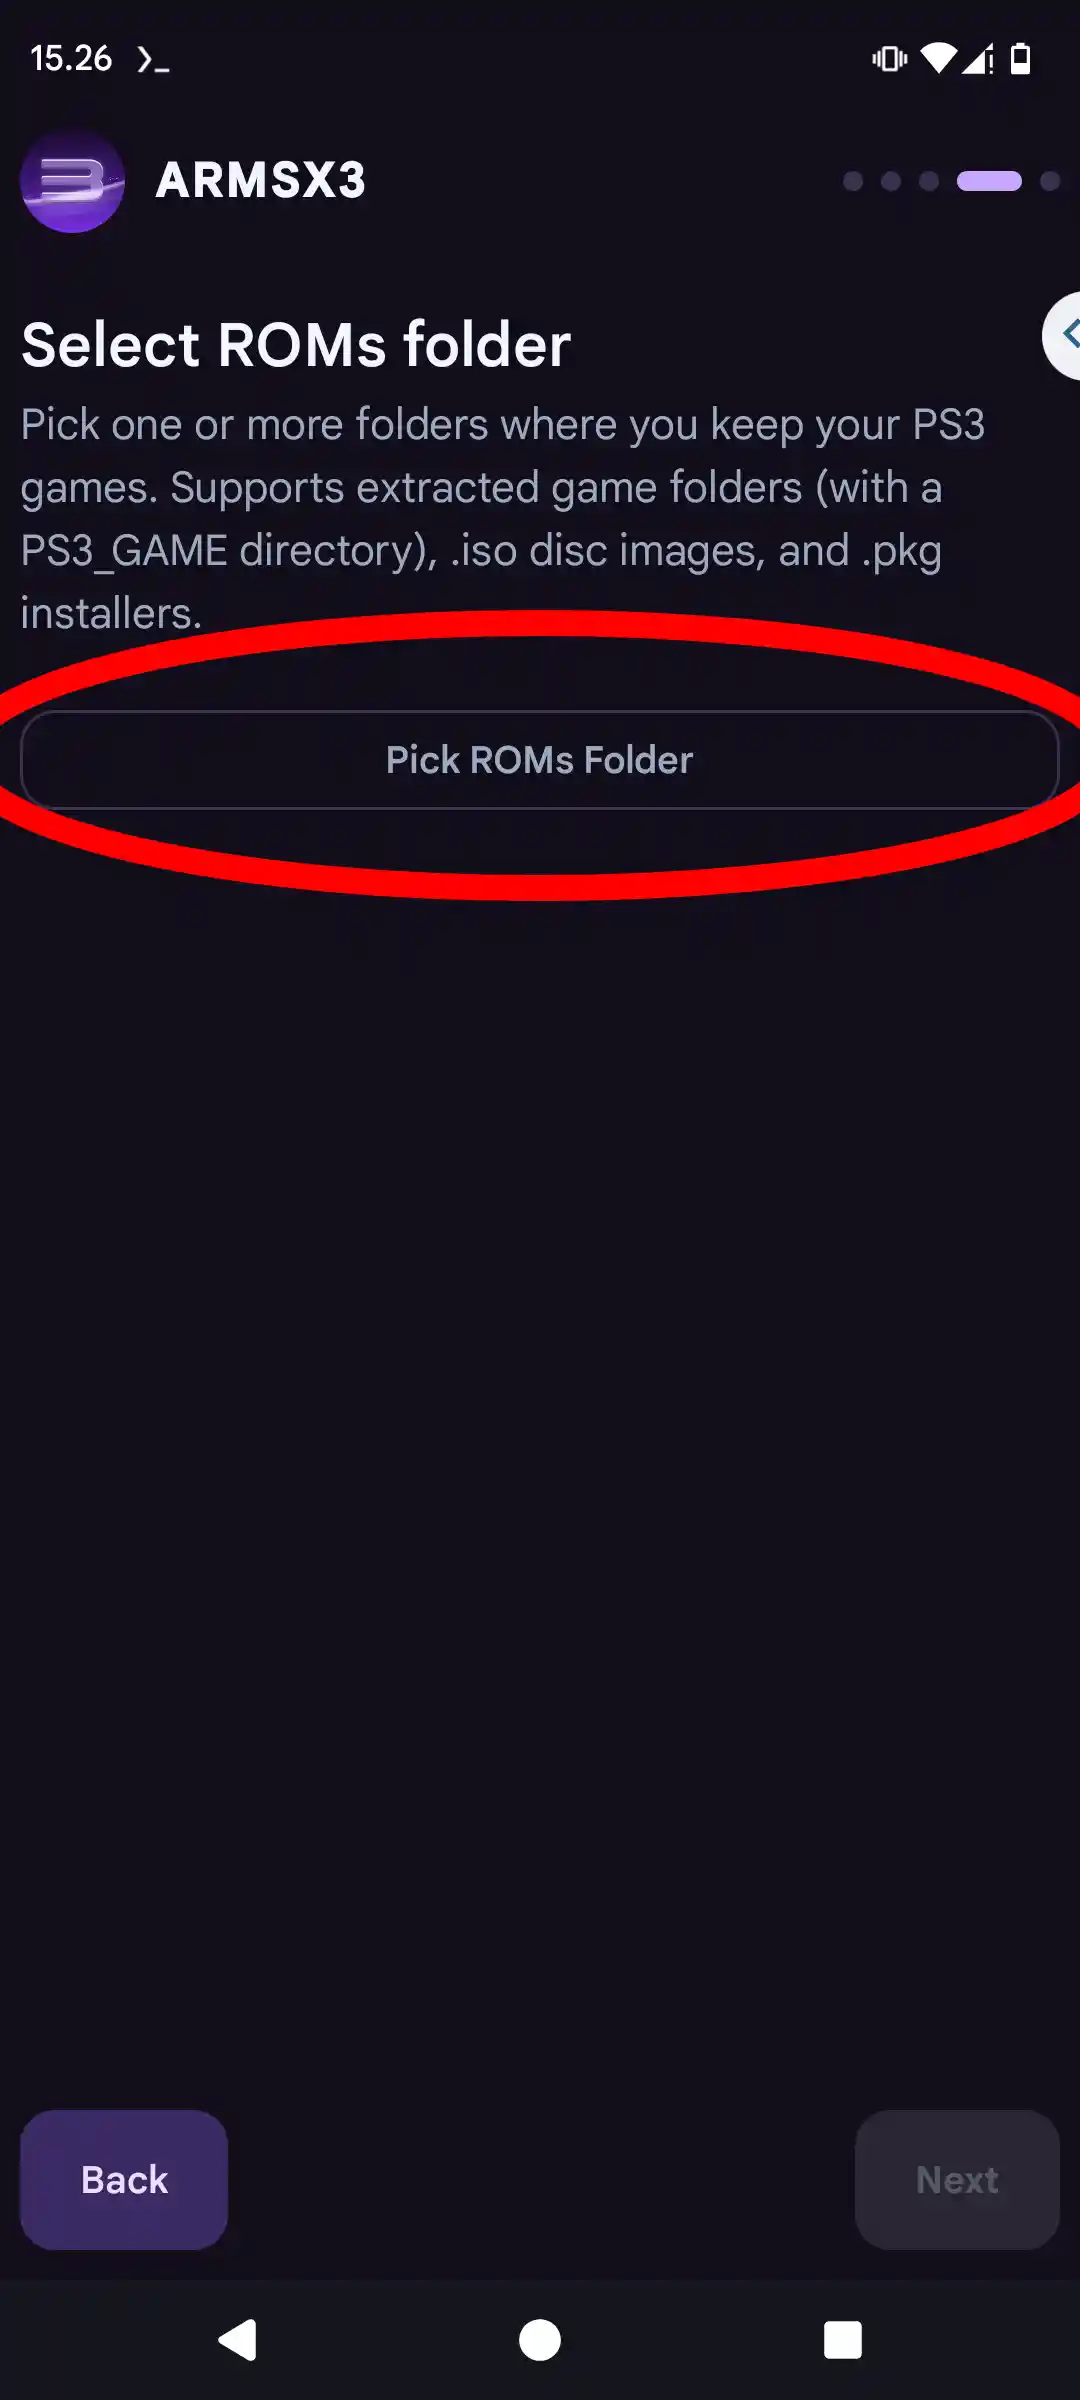
6. Add Your Games Folder
Now you need to add your game folder. Tap Pick ROMs Folder to select the directory containing your PS3 games.
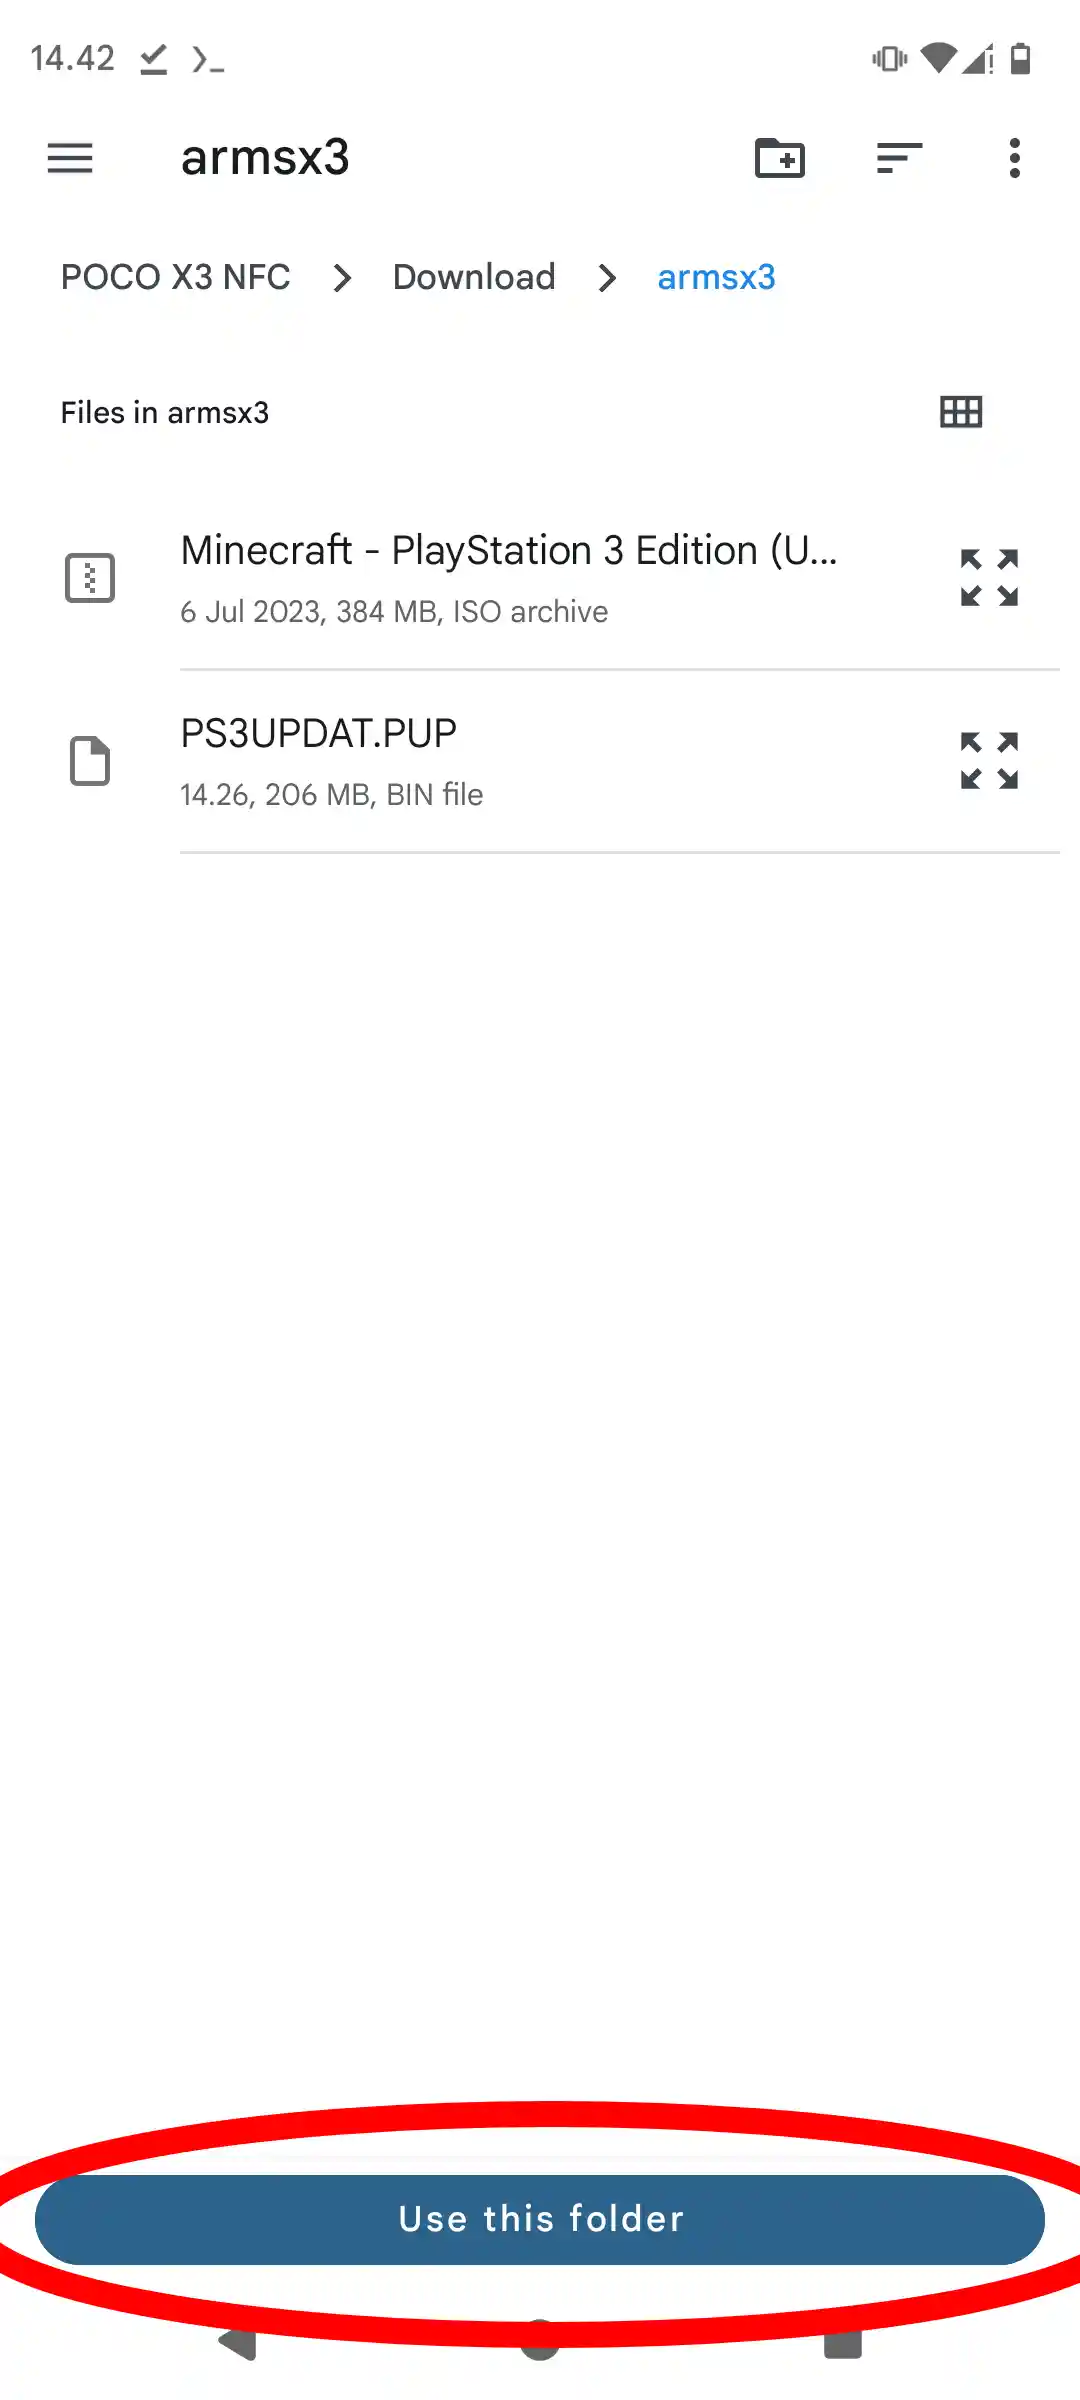
7. Select the Correct Directory
Navigate to the directory where you saved your PS3 games, then tap the Use this folder button at the bottom.
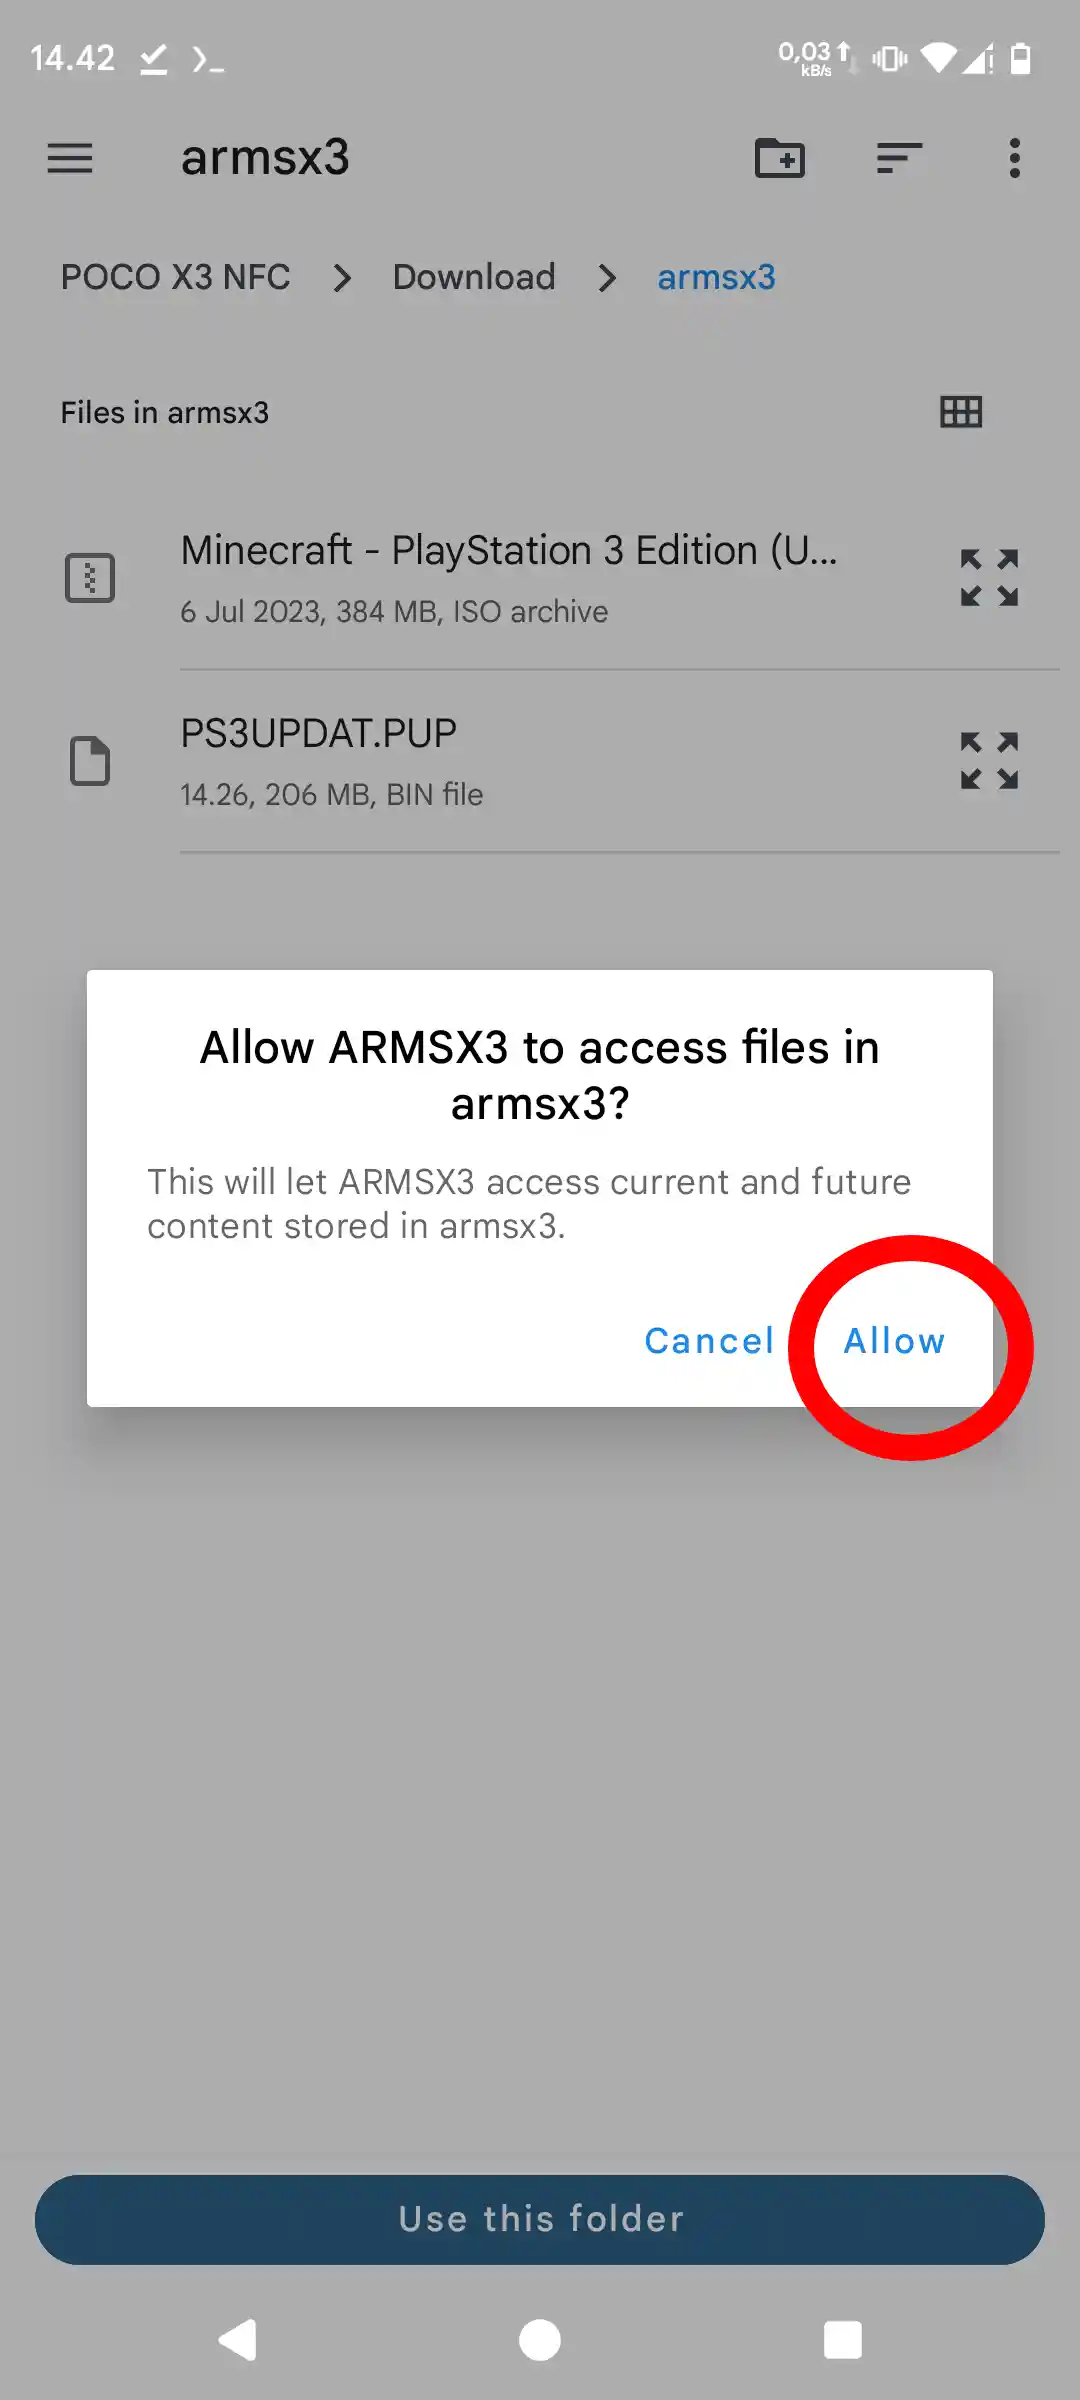
8. Grant Permission
You will be presented with a pop-up window asking for storage permission. Tap Allow to let ArmSX3 read your game files.
9. Confirm Games Folder
Your selected folder will now be listed. Tap Next to move to the final step.
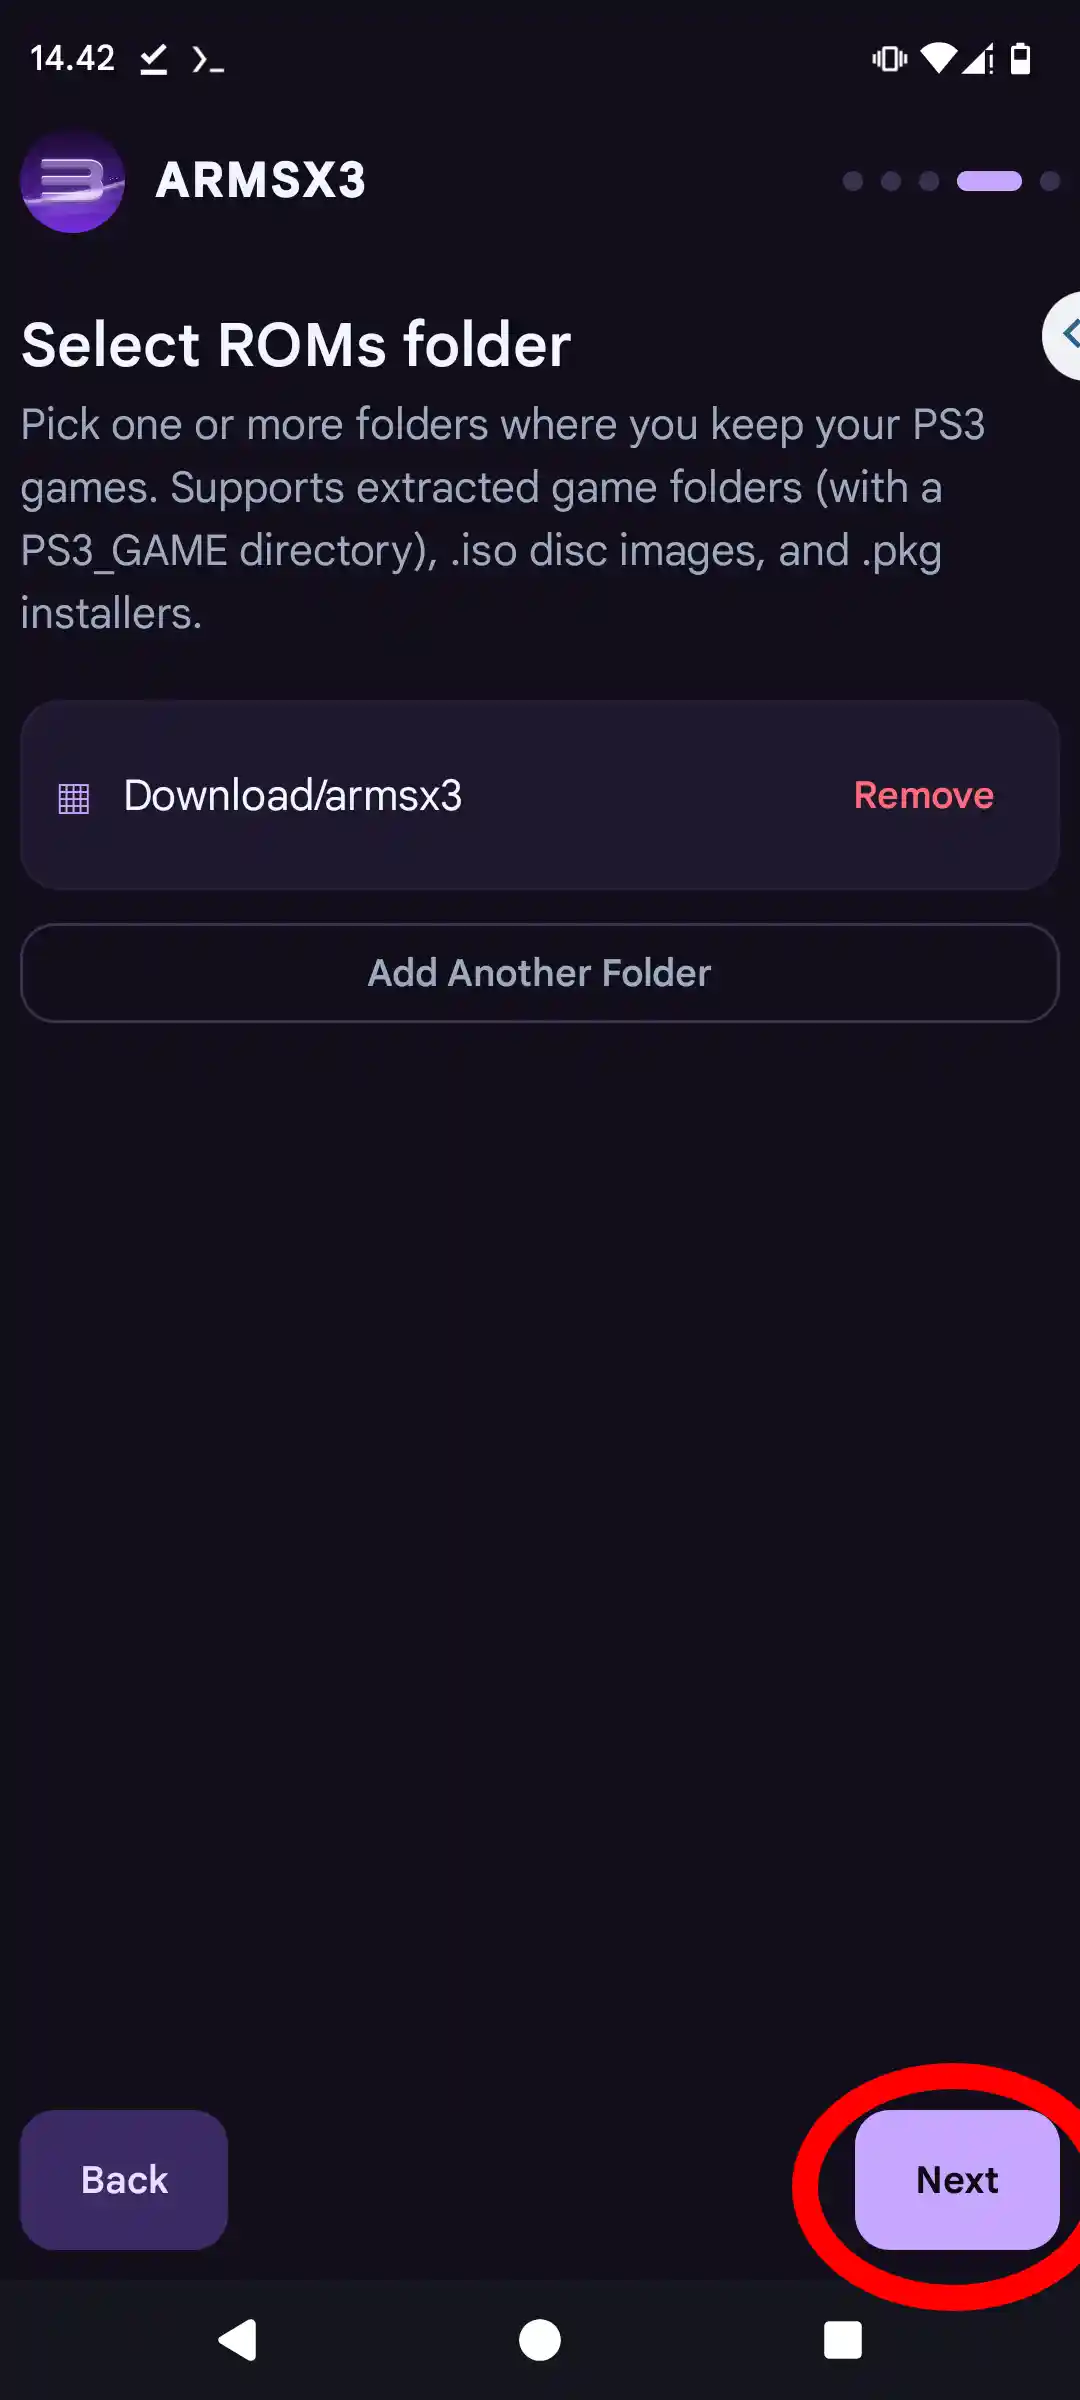
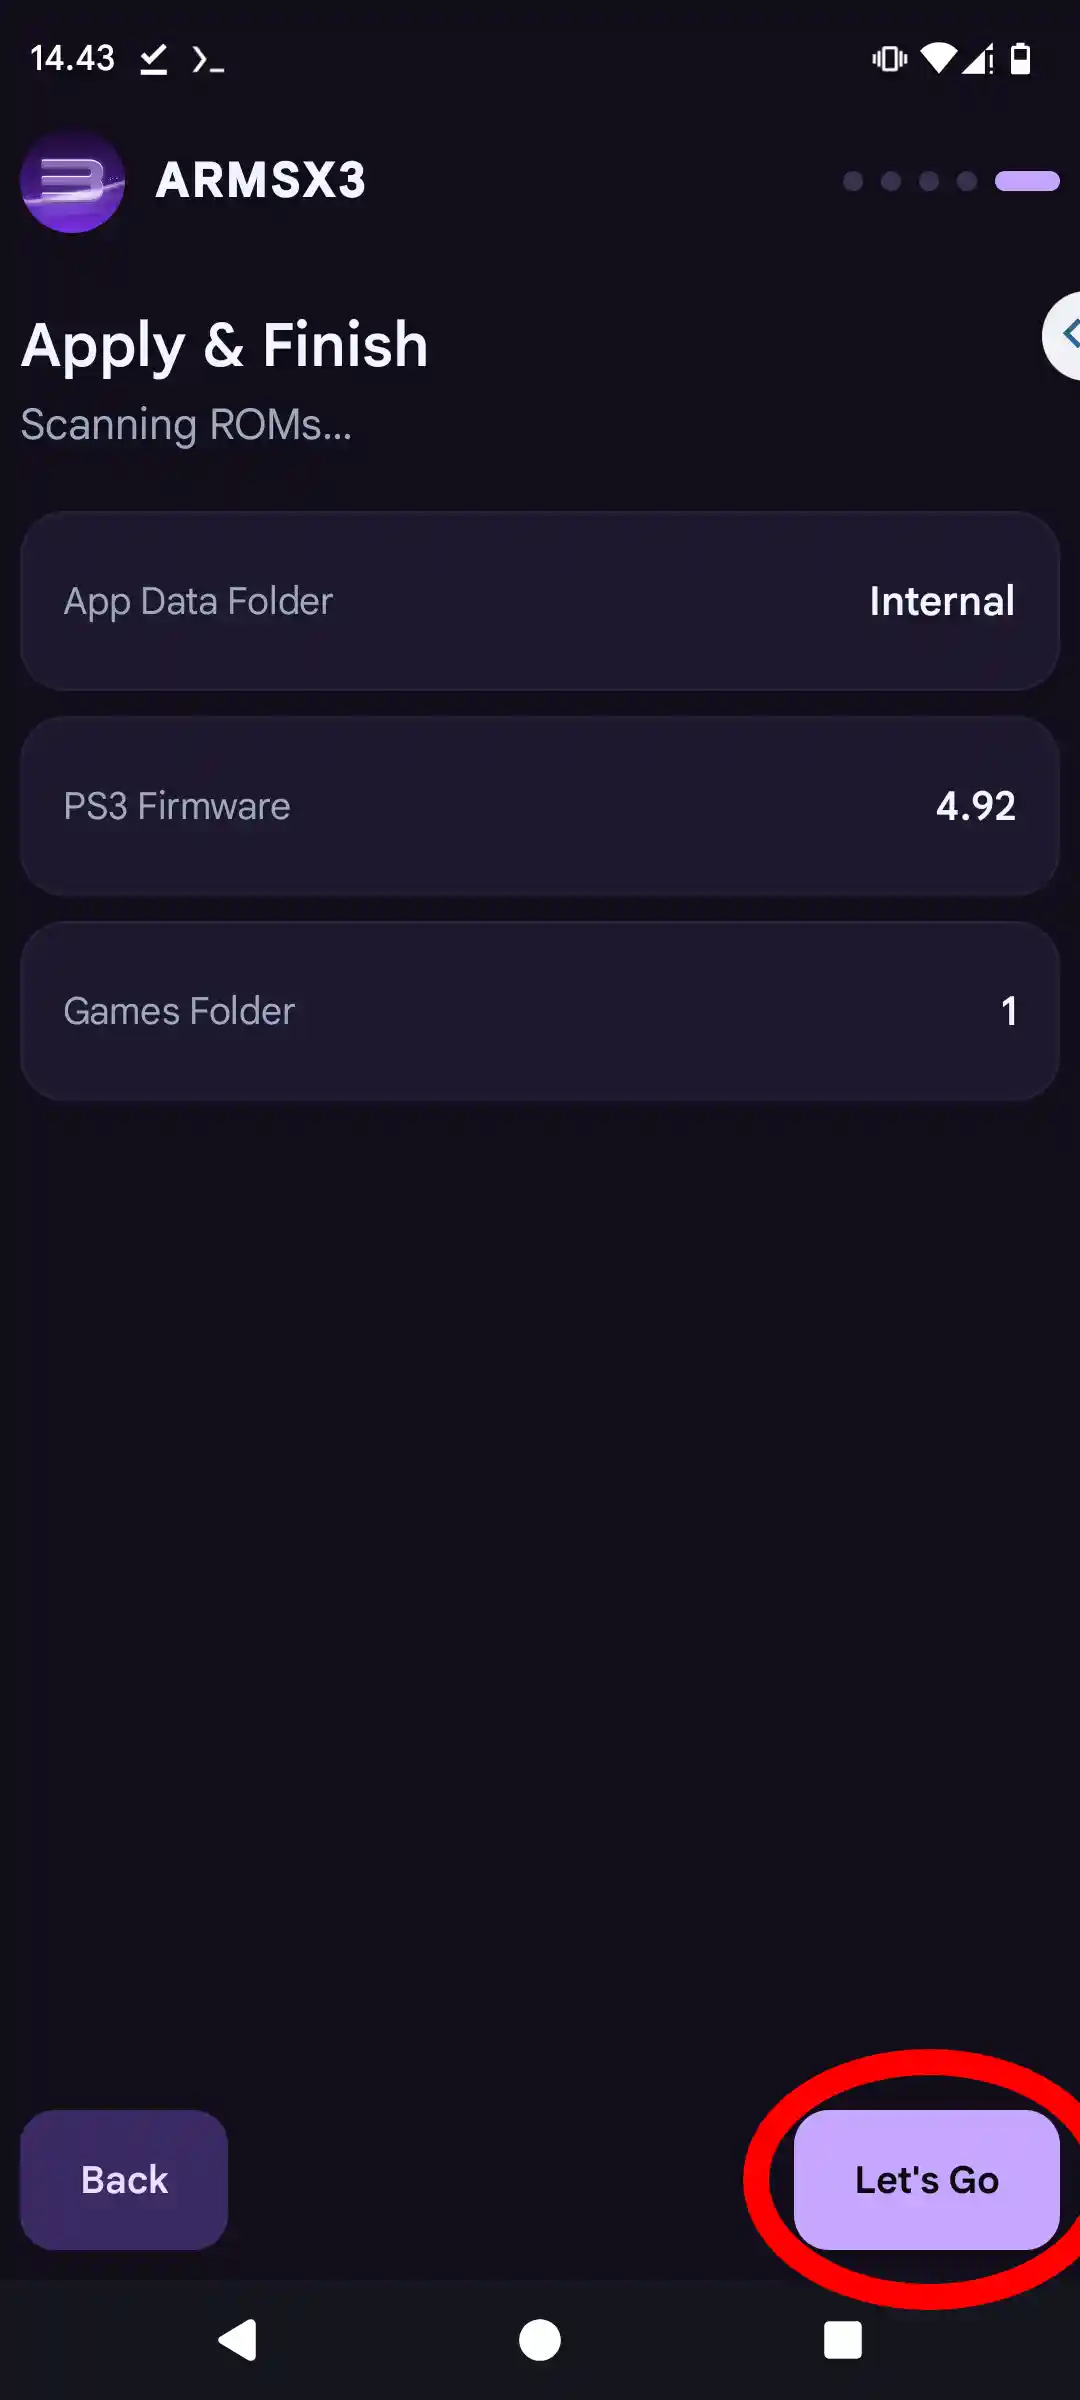
10. Apply & Finish
The setup wizard will scan your ROMs and show a summary of your configuration. Tap Let's Go to finish the setup.
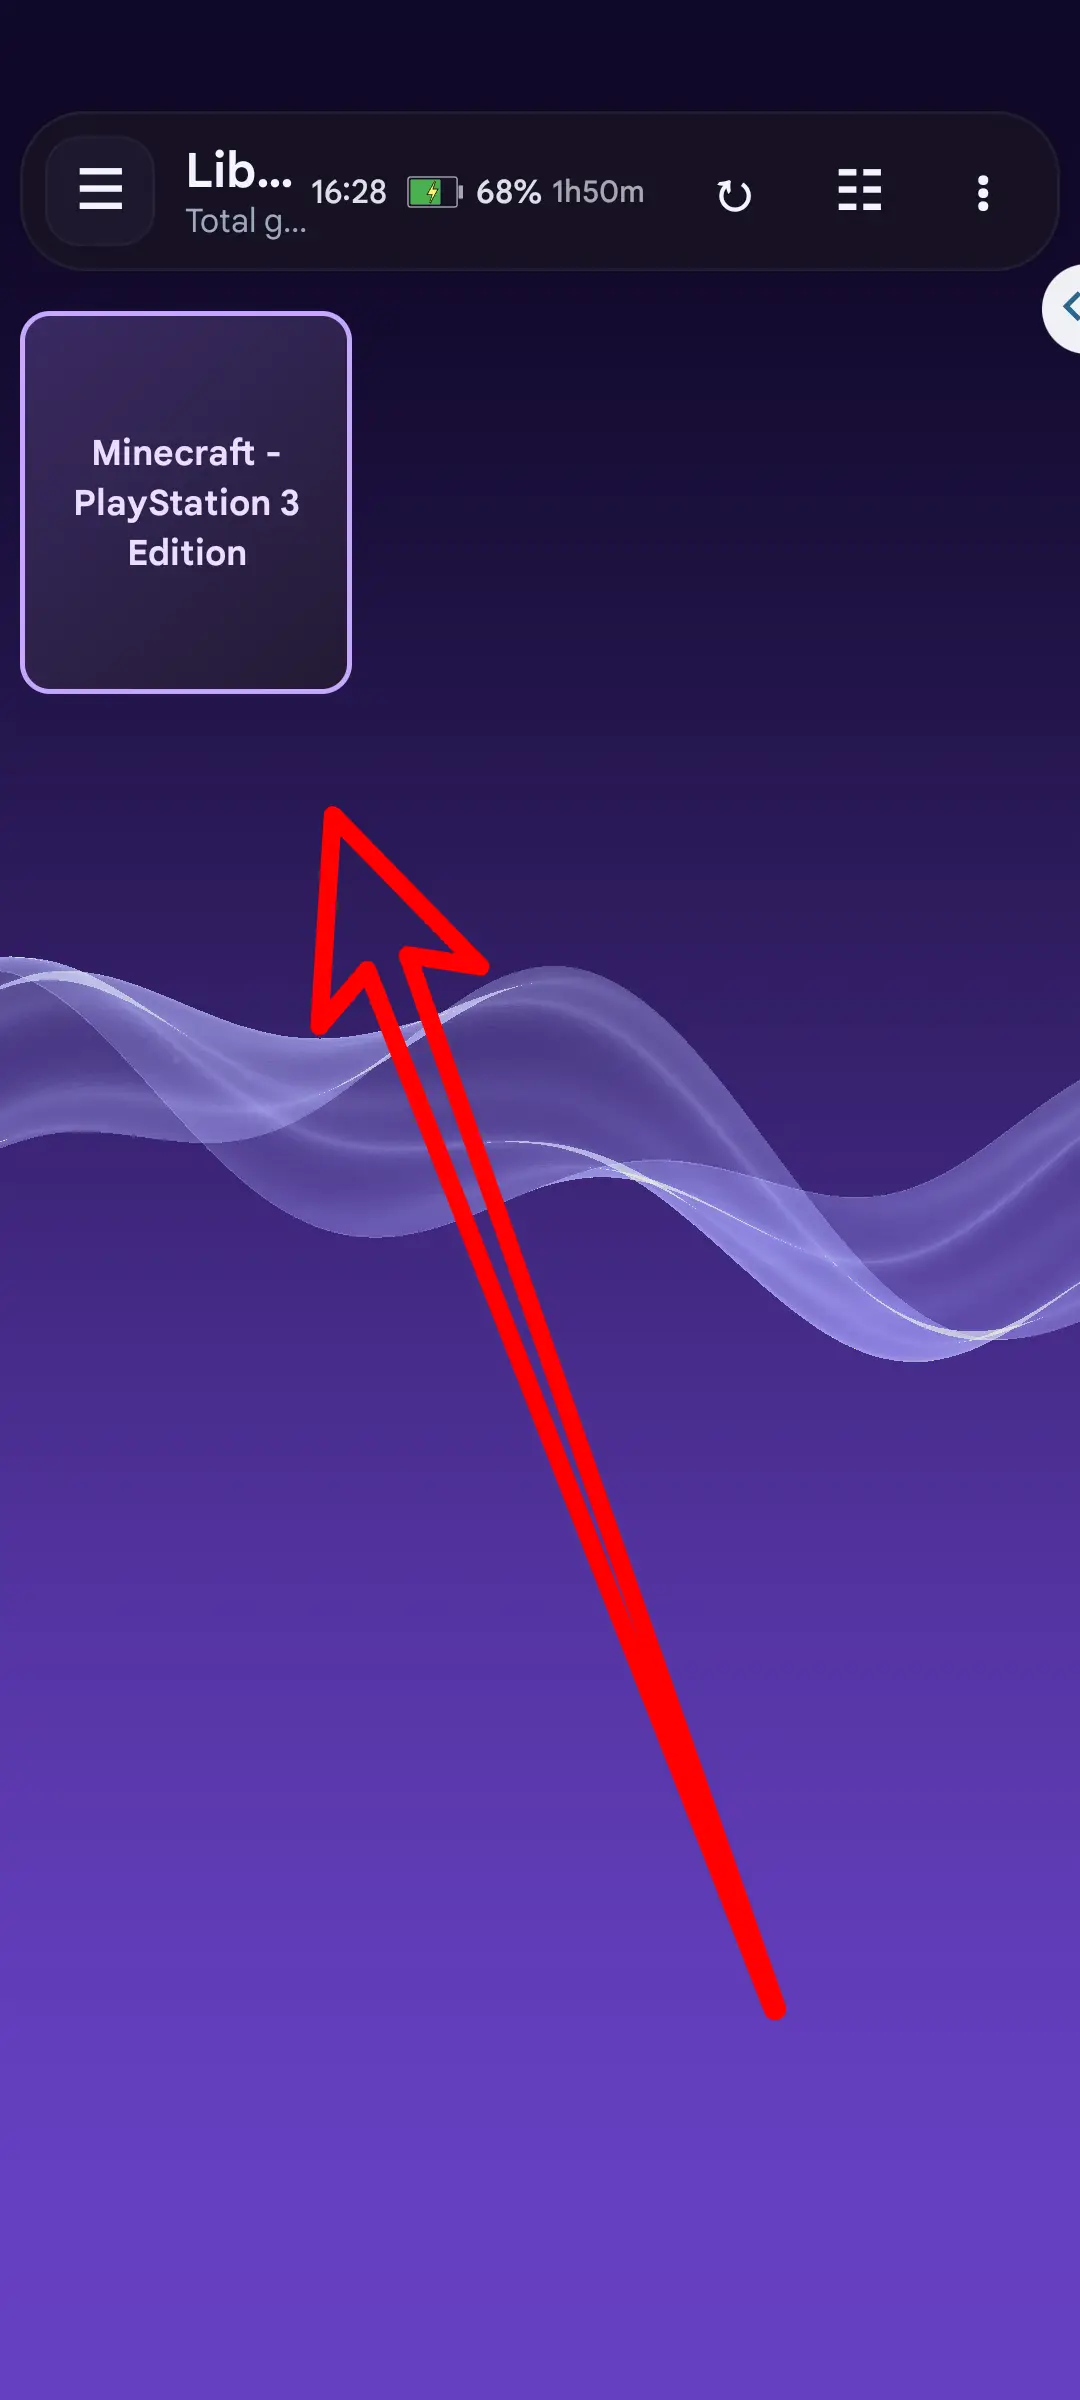
11. Installation has been successfully completed!
Congratulations! The ArmSX3 installation setup is complete. You can now see your game list in the library and start playing.
Installing a GPU Driver in ArmSX3
On most Adreno devices the driver Android ships with is too old for what ArmSX3 asks of Vulkan, and games close themselves the moment they start. Importing a newer driver is what fixes it, and ArmSX3 has a built-in importer for exactly that.
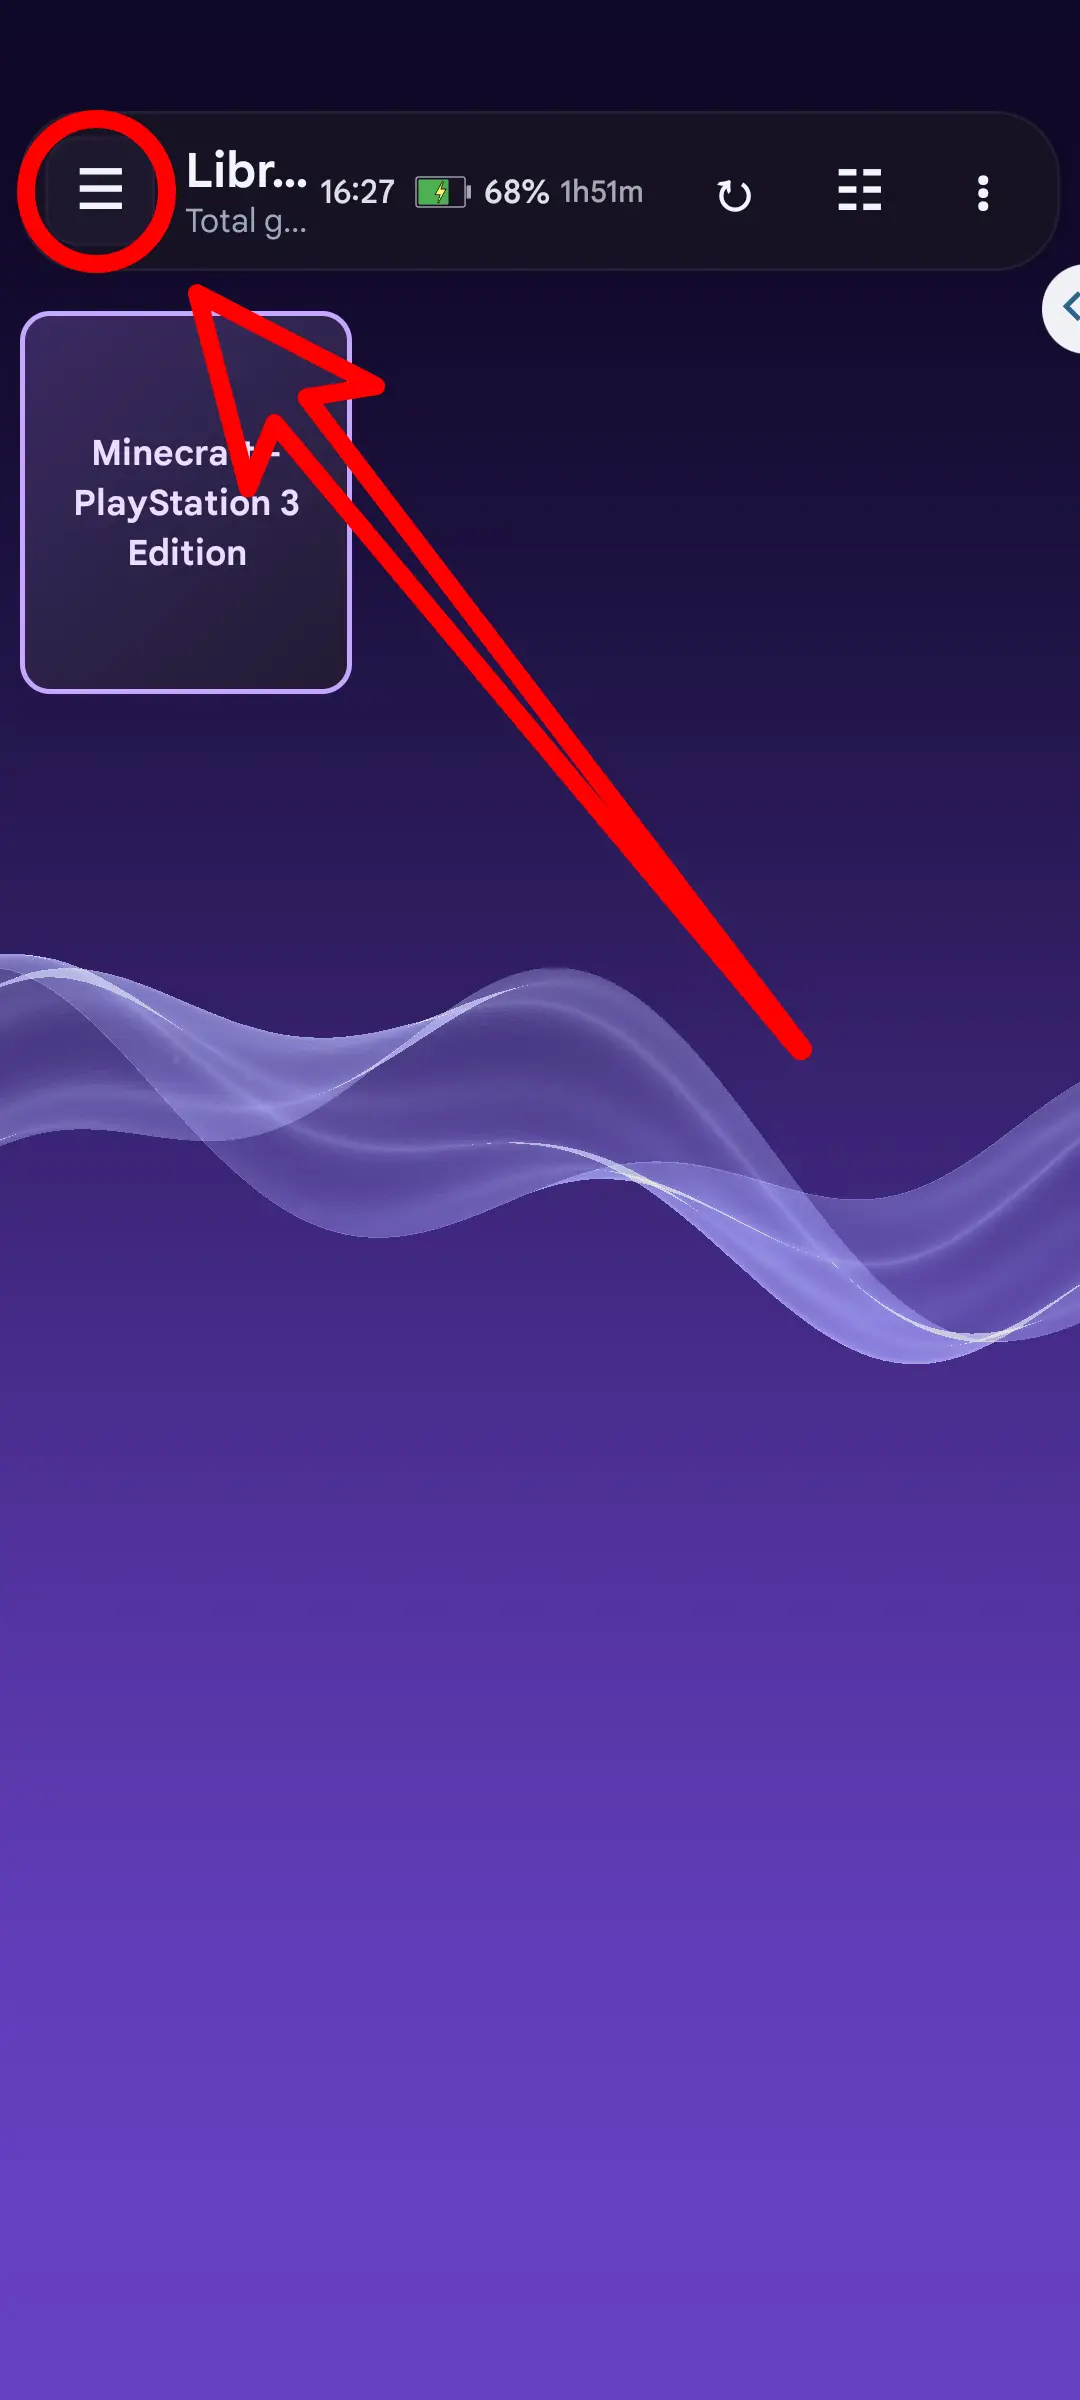
1. Open the menu
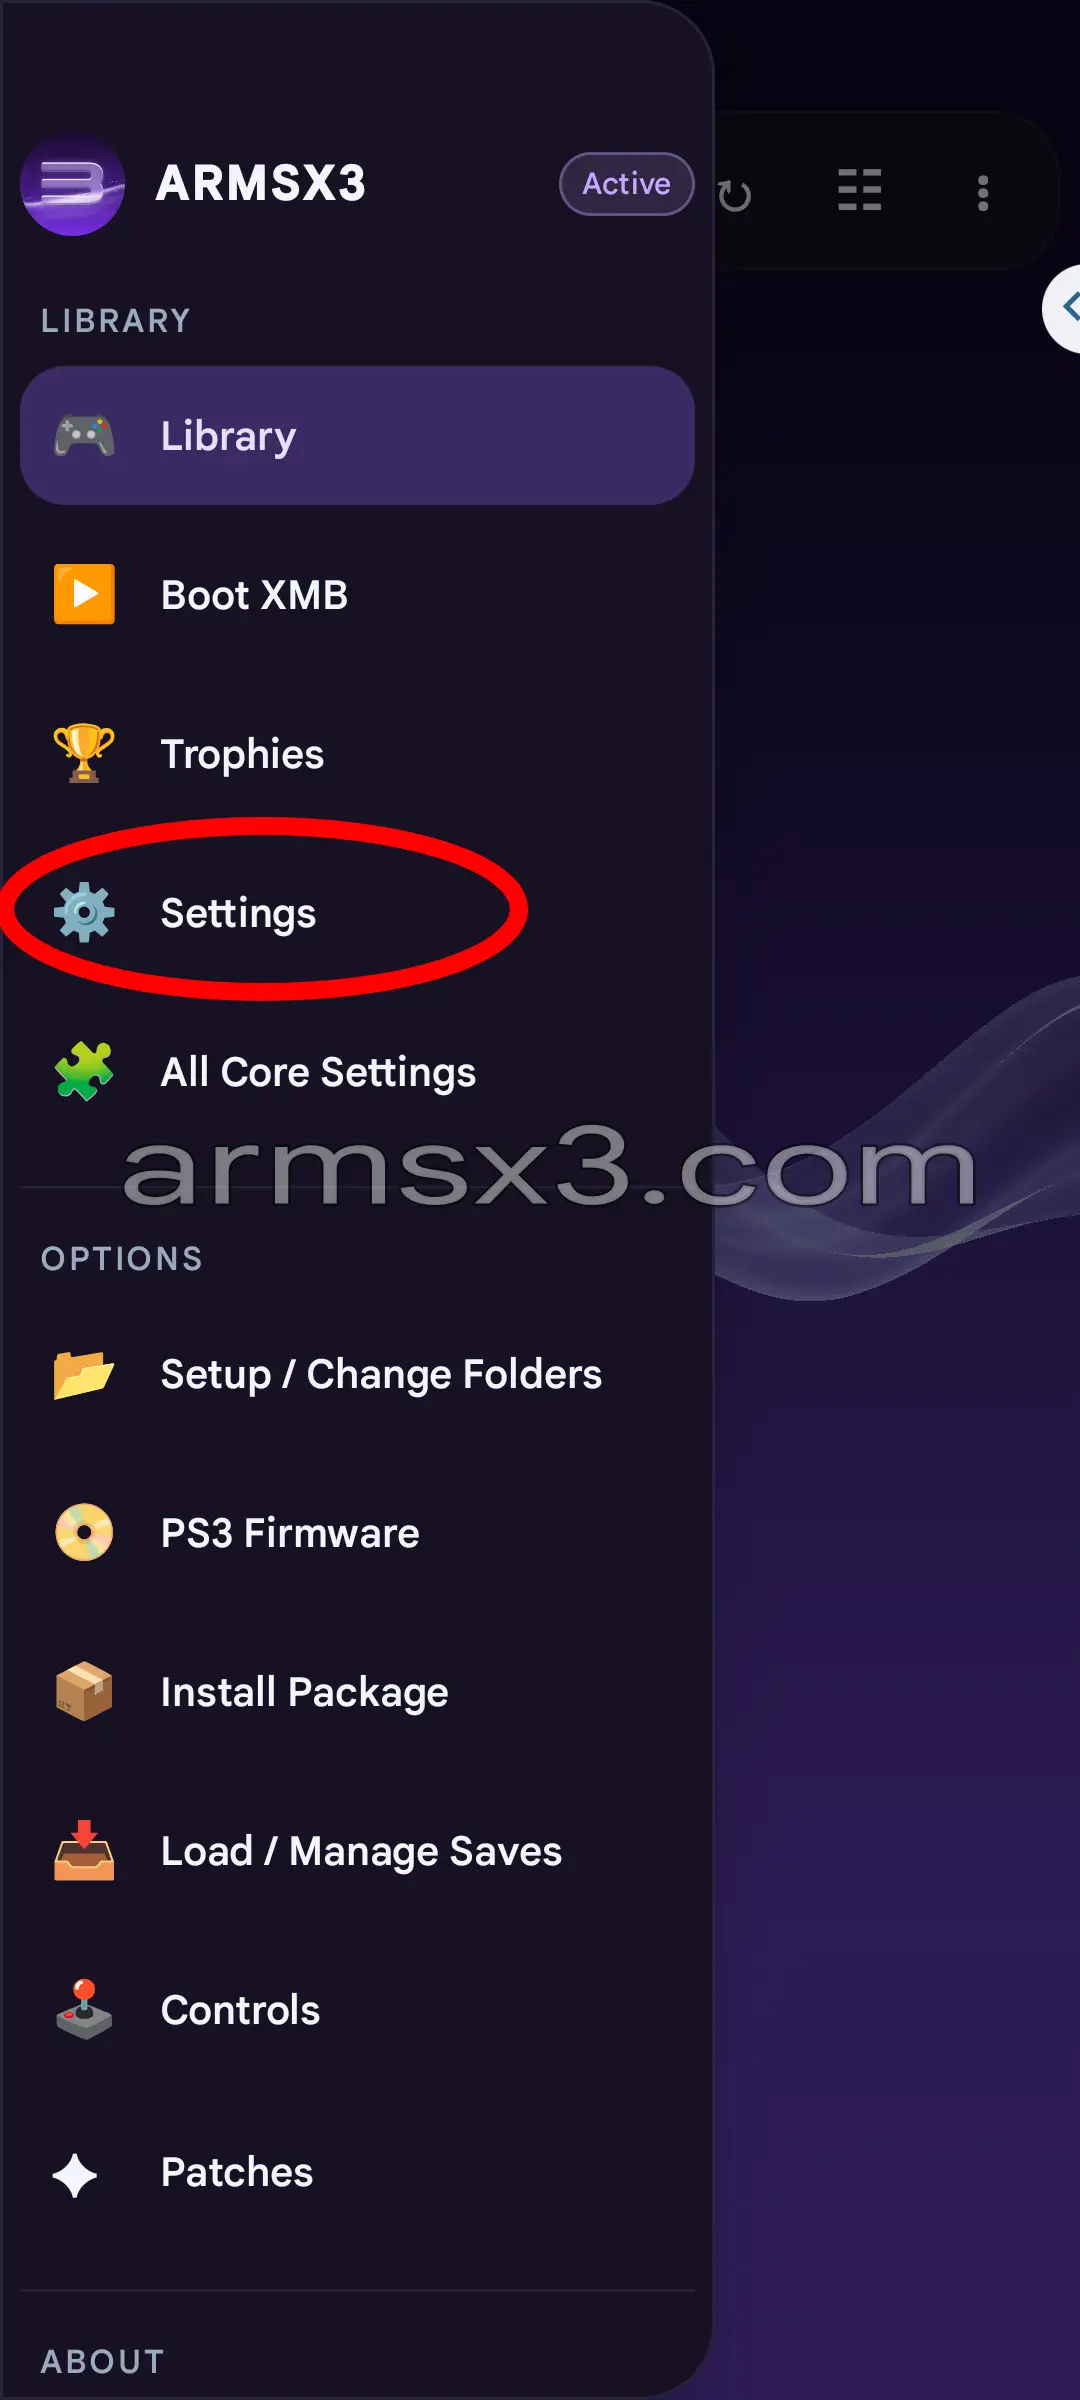
Everything to do with the GPU driver starts here. From the library, tap the ☰ button in the top-left corner to open the navigation drawer.
2. Choose Settings
Pick Settings from the drawer. The OPTIONS group further down is where you would come back later to change folders or reinstall firmware.
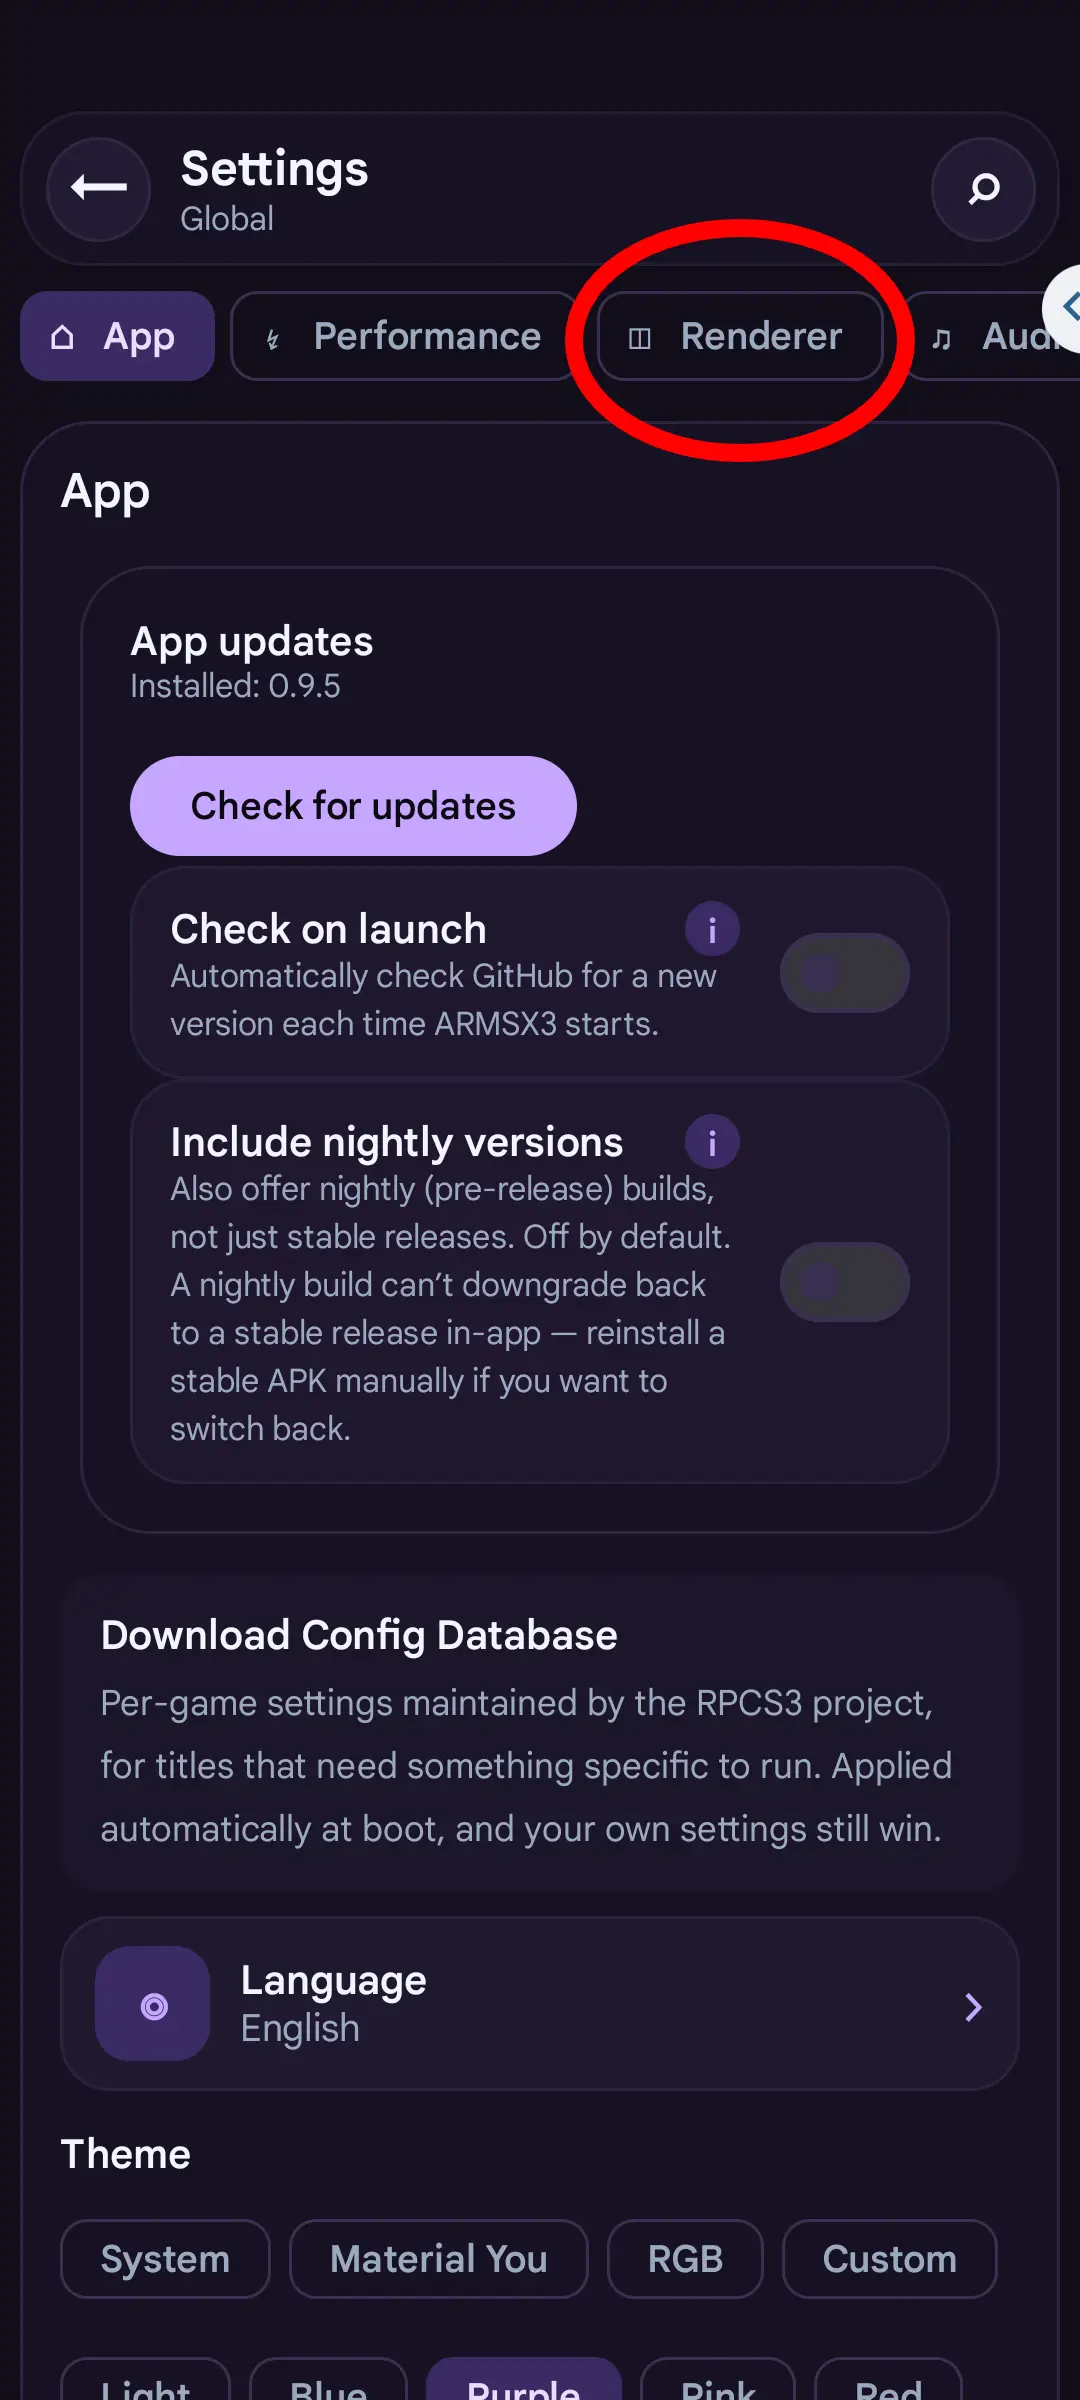
3. Switch to the Renderer tab
Settings opens on App. The driver lives one tab across, under Renderer. Tap it.
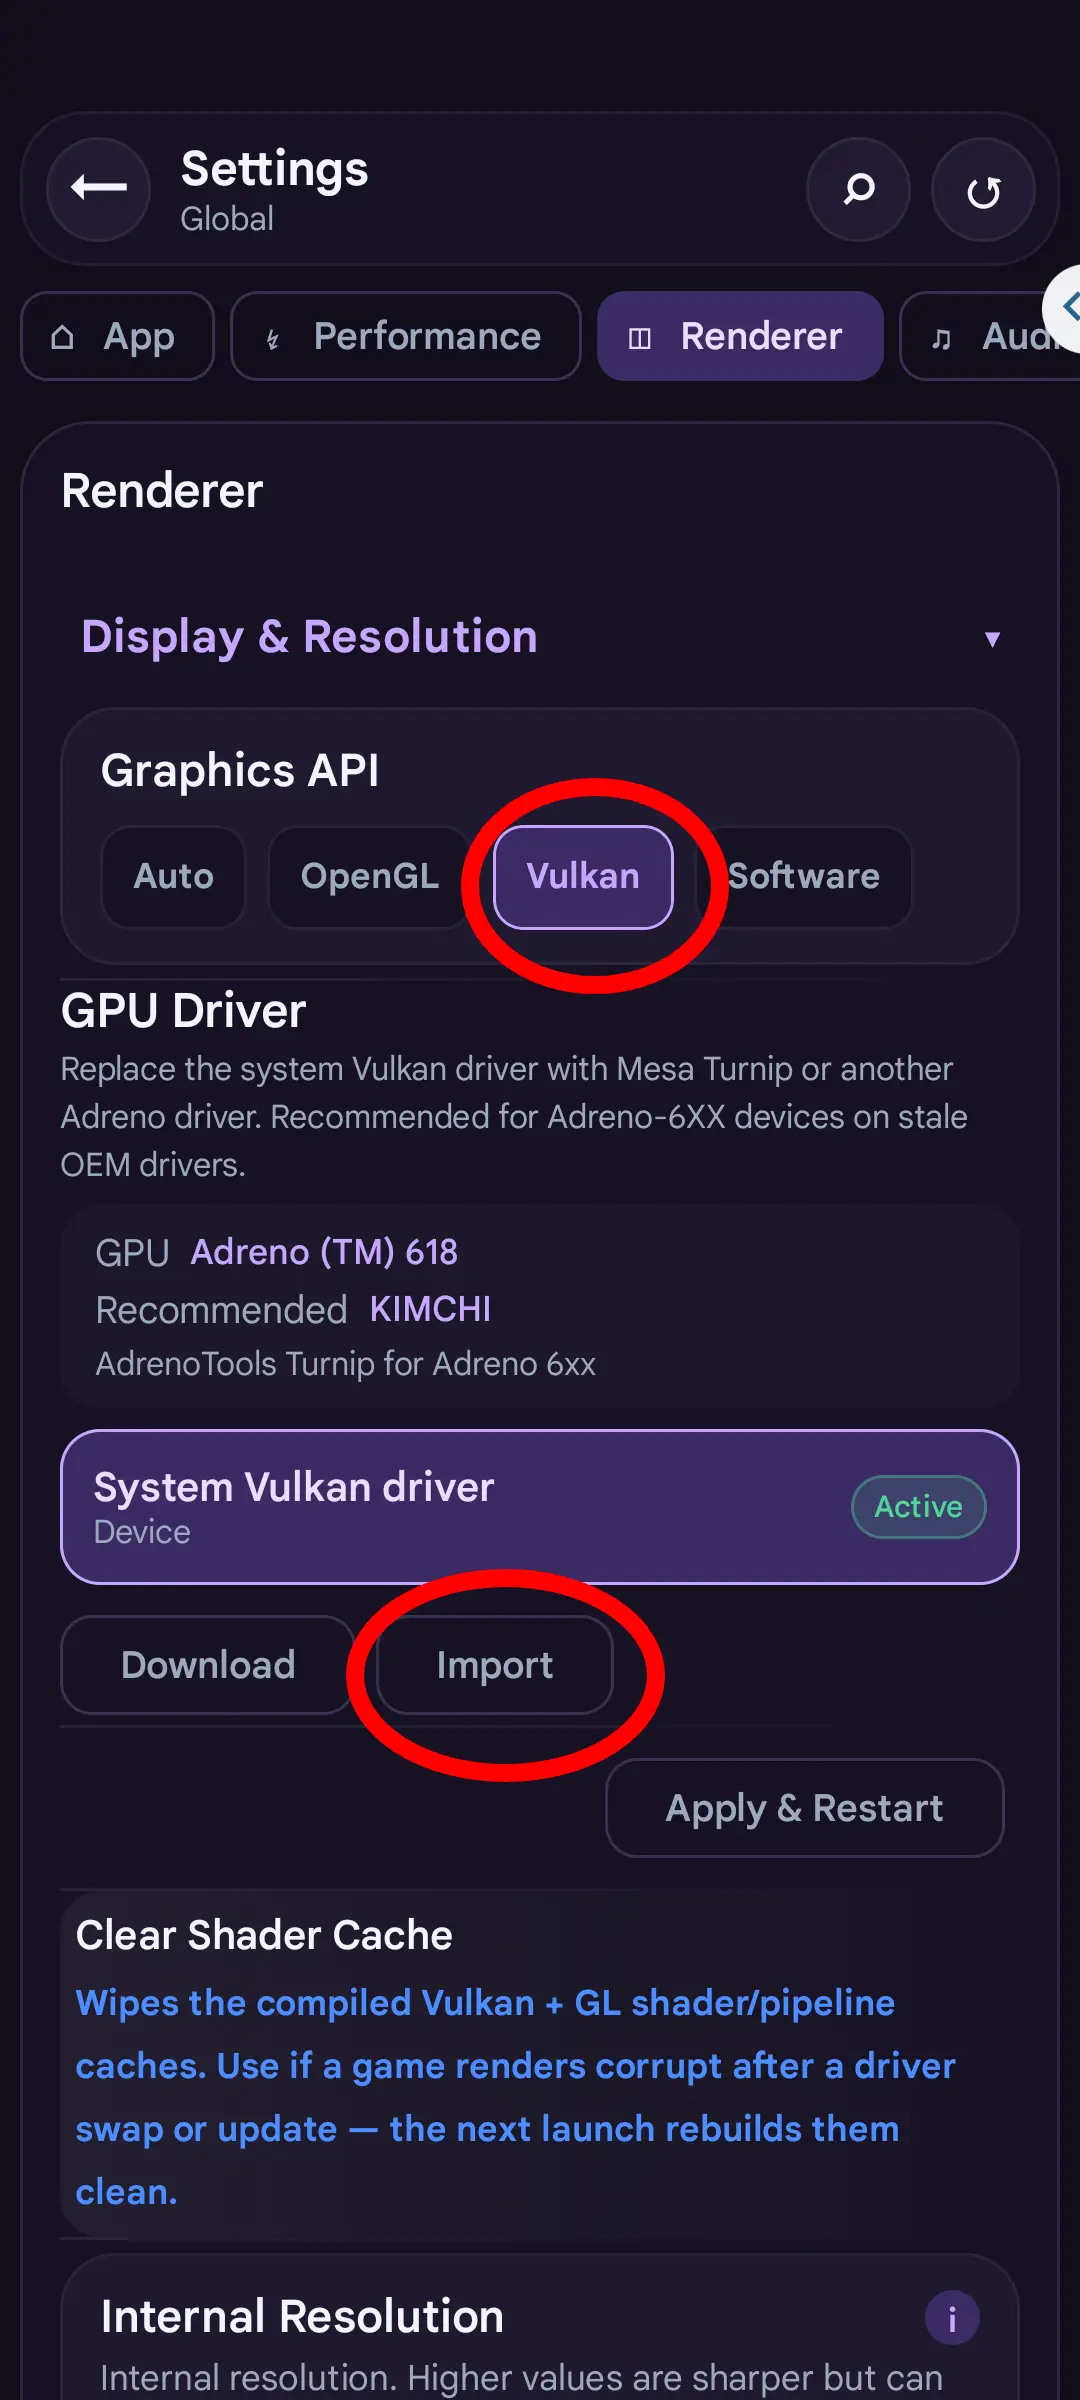
4. Check Vulkan is selected, then tap Import
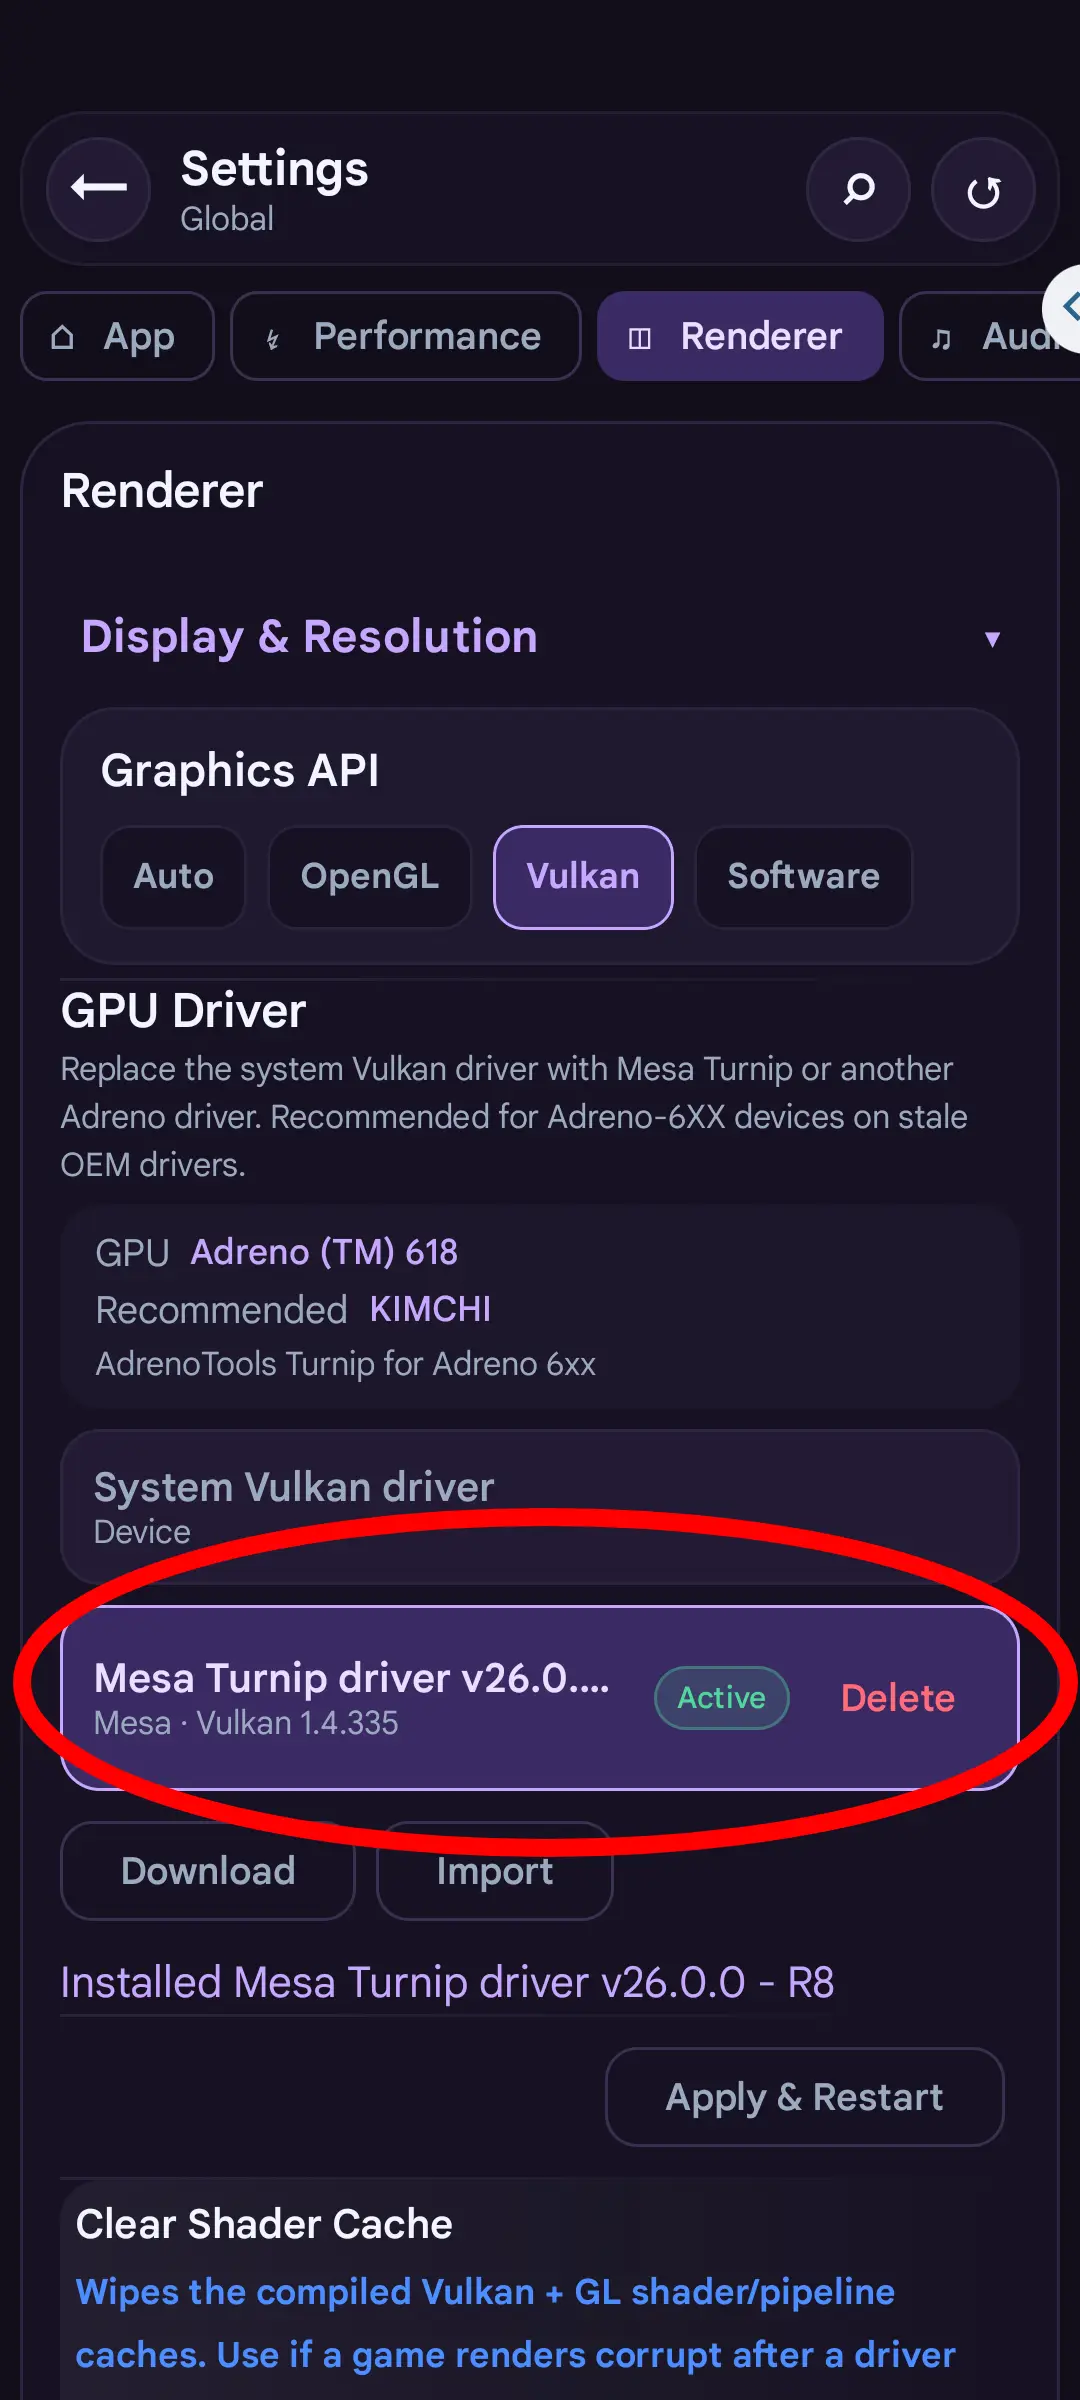
An imported driver only does anything while Graphics API is set to Vulkan — it is ignored under OpenGL and Software. Underneath, ArmSX3 names the GPU it found and recommends a package for it; that recommendation and the list on our driver page come from the same repository. Tap Import to load a file you downloaded yourself, or Download to fetch one in-app.
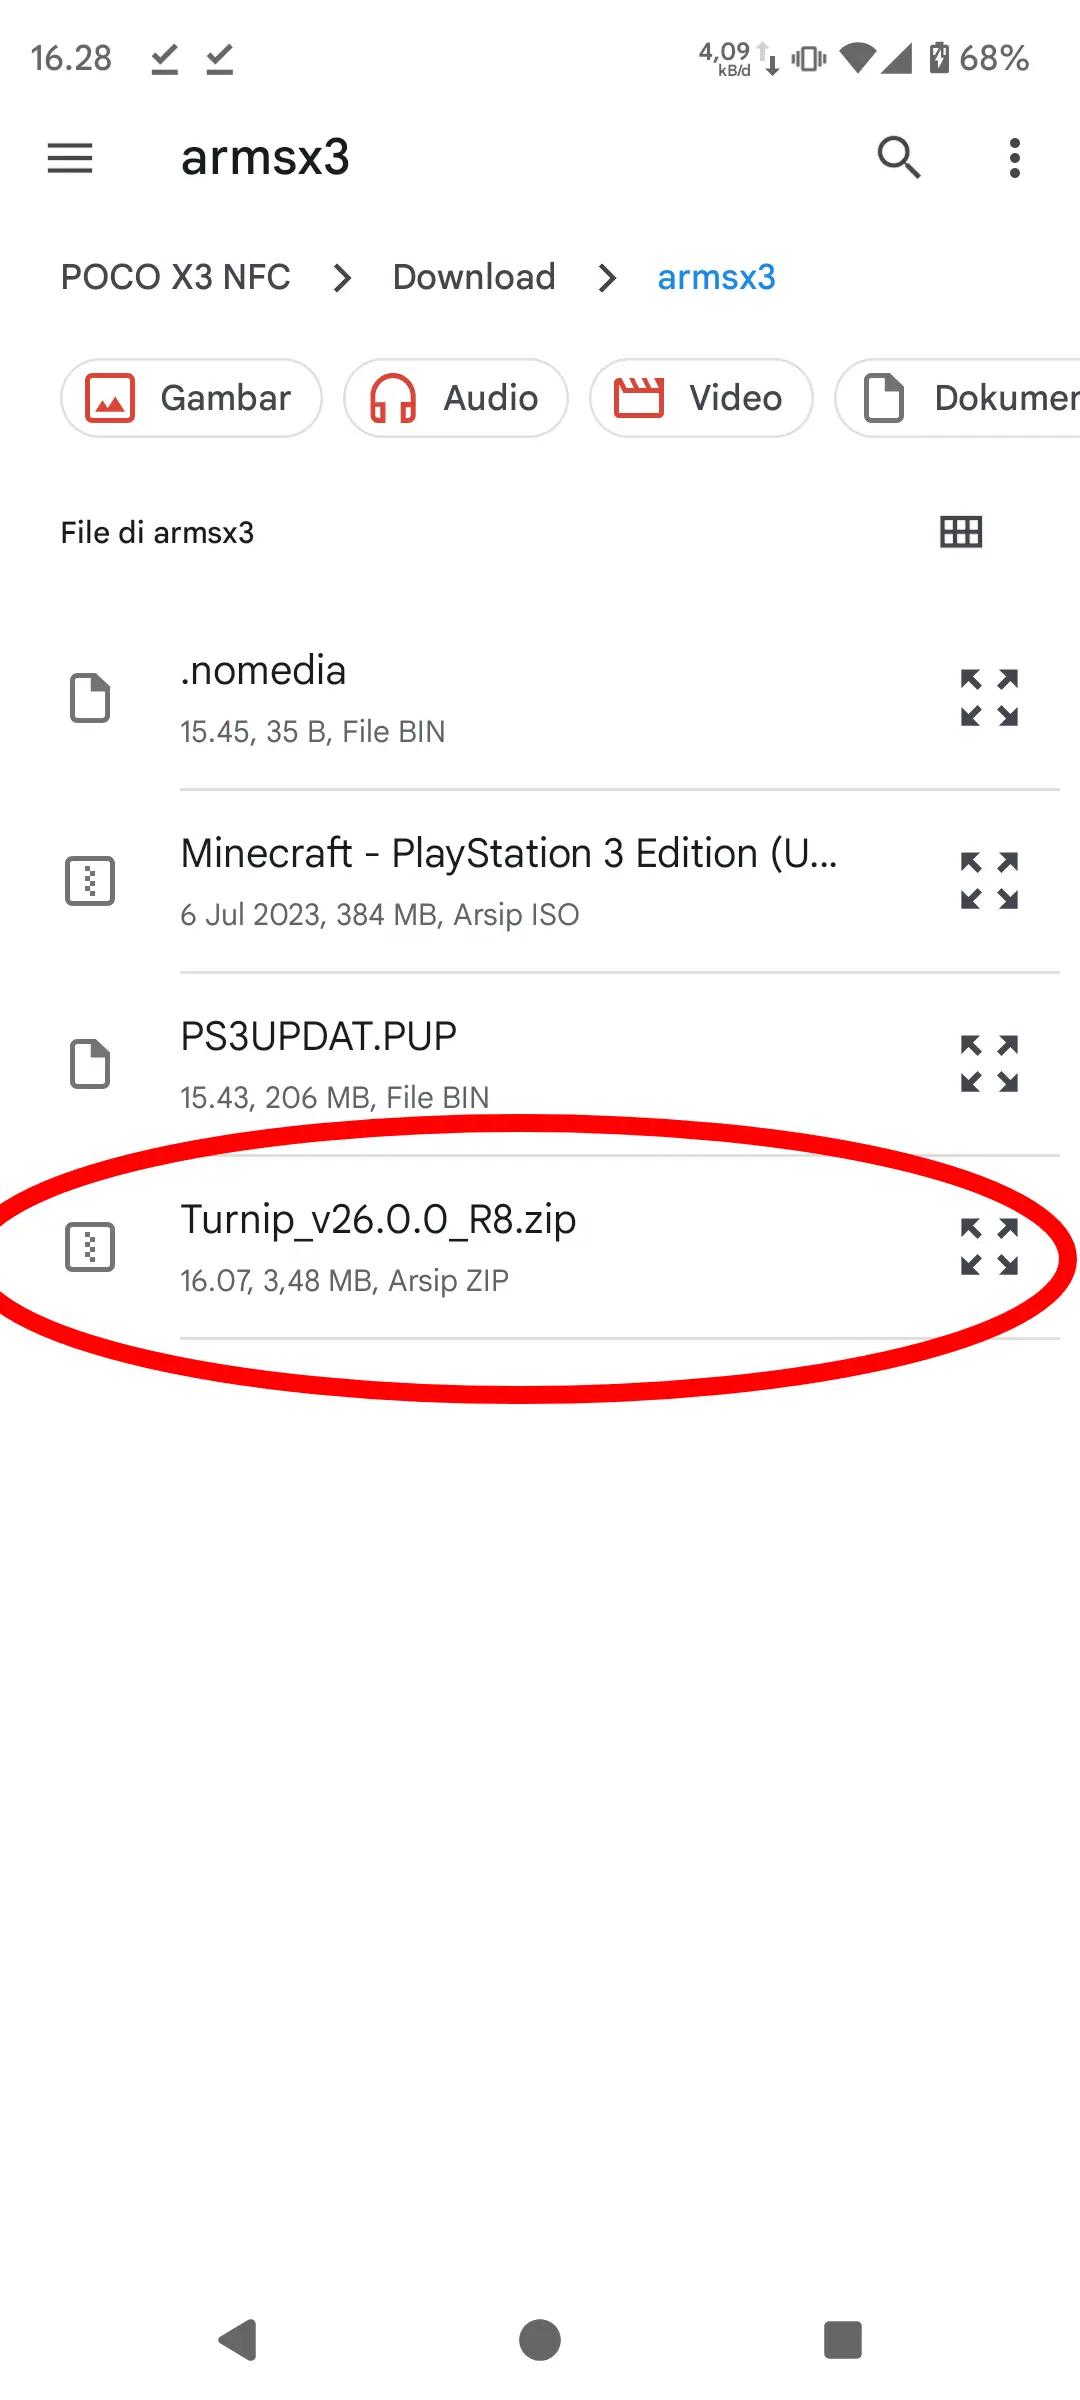
5. Pick the driver archive
Select the .zip exactly as you downloaded it. Do not unpack it first — ArmSX3 reads the archive itself and will not see a folder of loose files.
6. Apply & Restart
The driver now appears in the list, marked Active, with the Vulkan version it provides underneath. Tap Apply & Restart to load it. If a game looked fine before and renders corrupt afterwards, use Clear Shader Cache on this same screen: the caches were built by the old driver, and the next launch rebuilds them.
7. Back to the library
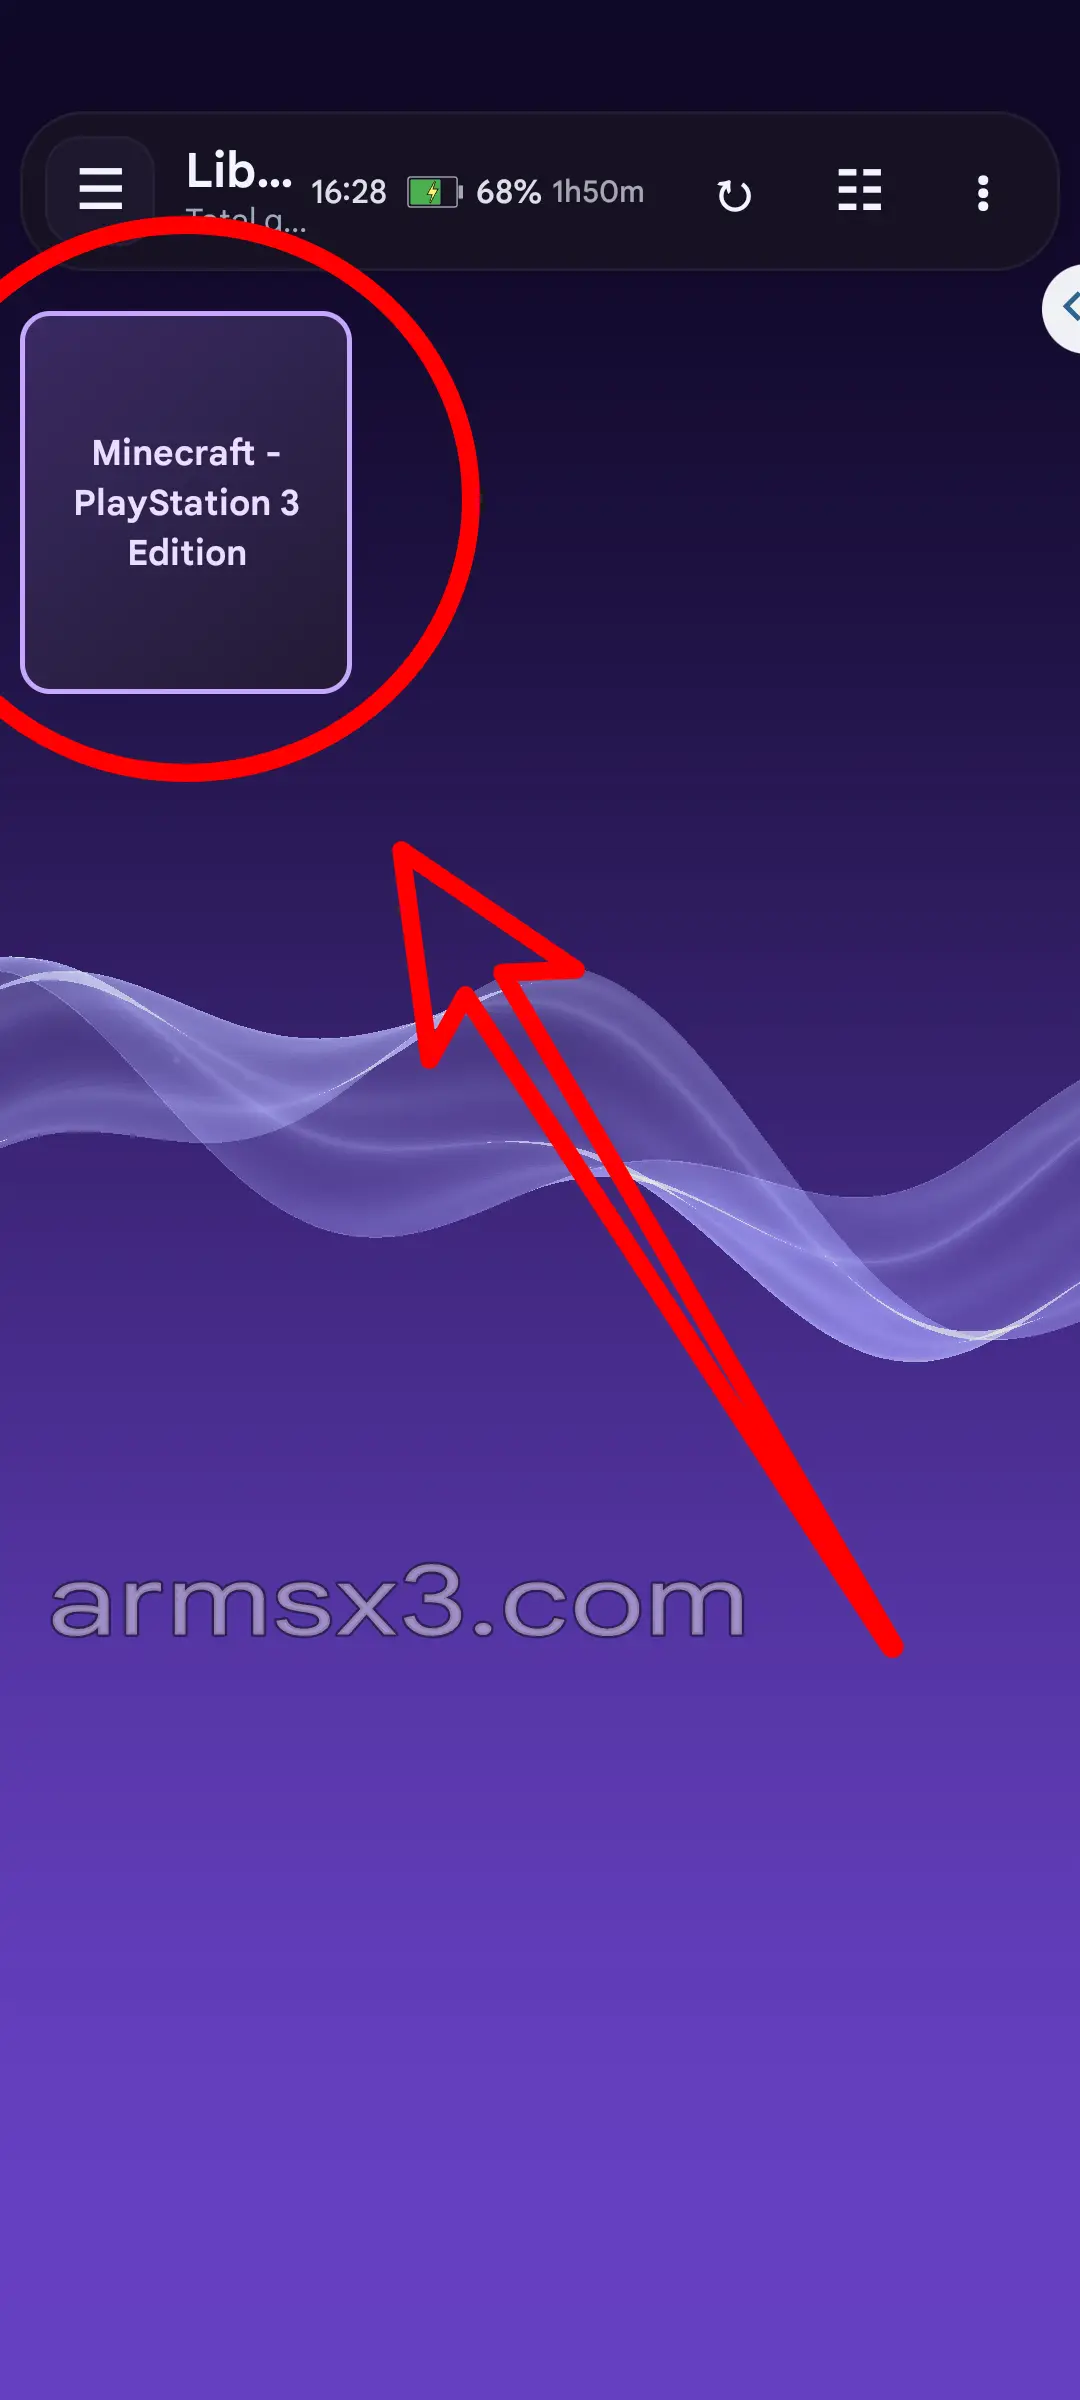
ArmSX3 restarts into the library with the new driver in use. Tap a game to start it.
8. Let the first boot finish
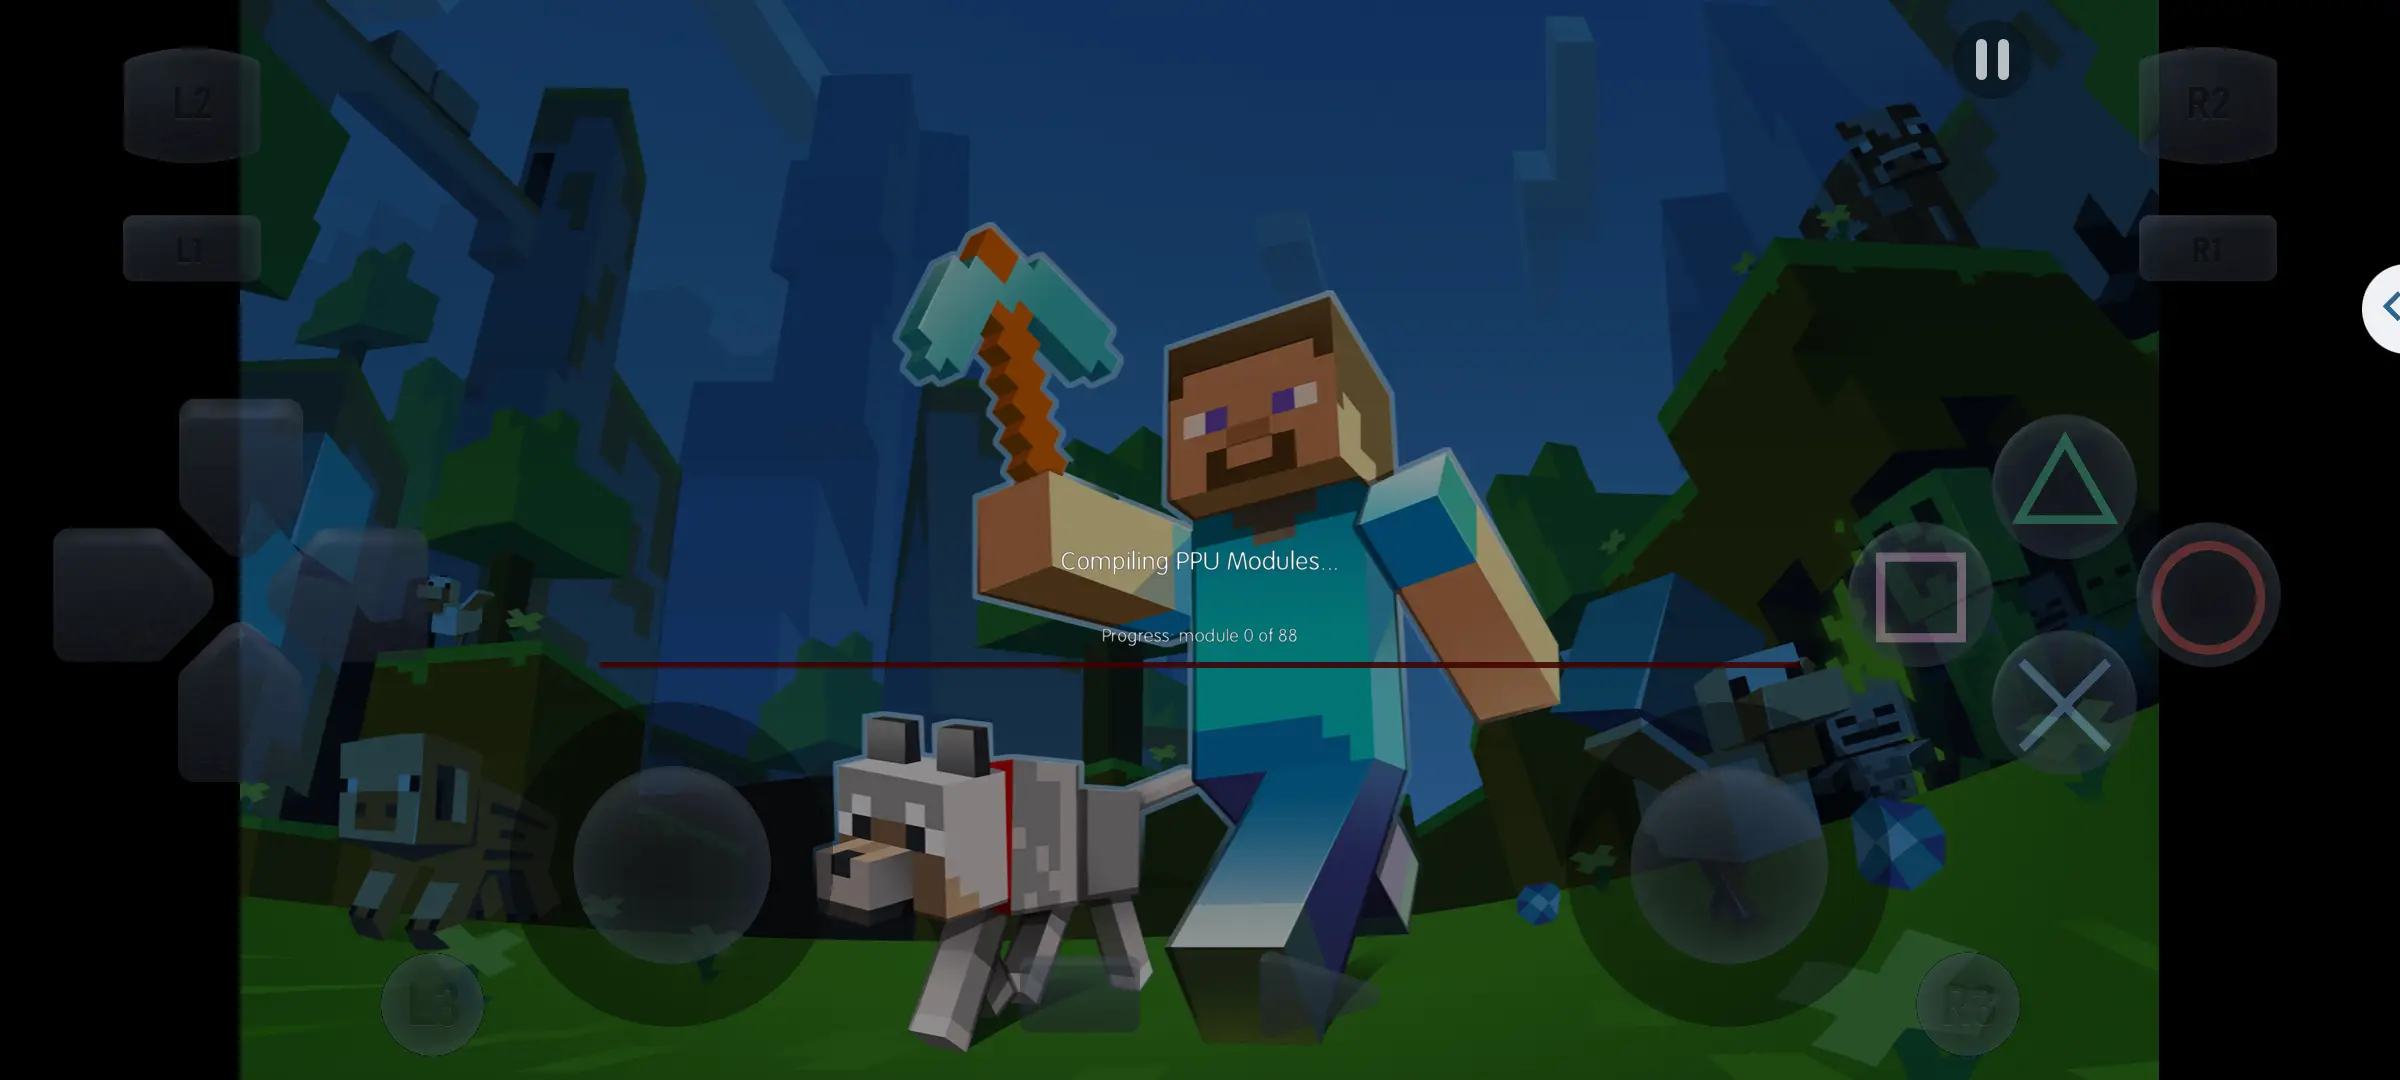
The first launch compiles the game's PPU modules and builds an SPU cache, and the progress counter can sit there for several minutes. It is slow and stuttery, and none of that means something is wrong — the results are cached, so the second launch is far quicker. Leave it alone until it settles before judging performance.
Settings and Performance
Speed is the limiting factor on every device tested so far, so these are the controls worth knowing before you start changing things at random.
Give the first boot time to finish
Before a game runs, its PPU modules are compiled and an SPU cache is built. That is the slow, stuttering part, and it is one-off: the results are cached and the next launch is much faster. On a device with 8 GB or less this used to be where the emulator ran out of memory and died; compilation is now budgeted against free memory and waits instead.
Clearing the shader caches
All settings → Performance has Clear PPU Cache and Clear SPU Cache. Clearing SPU keeps the compiled PPU modules, so games still boot quickly afterwards. Clearing PPU wipes both, because the SPU cache lives inside those directories — expect a full recompile after it.
Aspect ratio
Two separate things, and they are easy to confuse. Screen aspect ratio has presets from 4:3 up to 21:9 plus a custom slider, and controls how the image fills your display. Console Aspect Ratio tells the game what shape it is drawing for, which some titles read and change their rendering to match.
All Core Settings
Every option the RPCS3 core exposes is available, and it can be scoped to a single game and opened from the in-game menu. Per-game settings are the safer habit: a change that rescues one title often costs you performance in another.